This pumpkin is so cute! And easy to make too!
Designed by Two Paper Divas
Fall is almost here so that means it’s pumpkin time!! Look how cute this pumpkin is and wouldn’t it be perfect to decorate your home, office, desk, etc.
This project is made with several sizes of accordion medallions.
Gather your supplies: card stock or patterned paper (we used patterned paper), felt, wire, tag, twine and twig
First cut your strips of paper. Here are the sizes and number of each:
1″ x 12″ – one; 1-1/4″ x 12″ – two; 1-1/2″ x 12″ – three
Score all pieces every 1/4″.

Next, create your medallions. Using a large pop-up glue dot (or hot glue) use a 1-1/4″ punched circle to hold these together. We used the same color of patterned paper on the top circle so it blends in.

Then using the glue gun again, stack the circles in the following order. Starting at the bottom, a 1-1/4″ medallion; then, three 1-1/2″ medallions; then, a 1-1/4″ medallion. Leaving the 1″ medallion for the top.

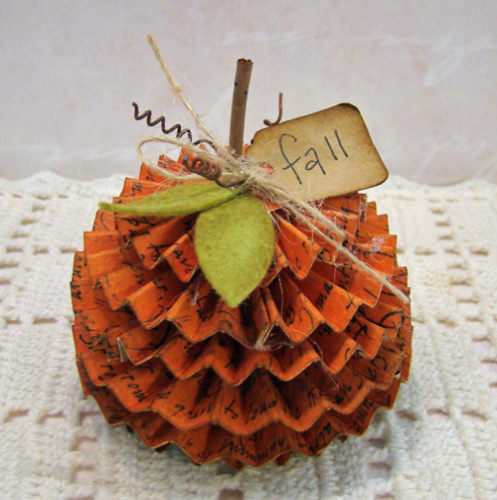
To create the top of your pumpkin: Once your pumpkin is assembled, we used a paper piercing tool to poke a hole in the top circle only so that the twig fits down in the circle. Hot glue it in the hole. Attach the felt leaves, wire and attach a tag. We hand wrote “fall” on the tag but of course, you could stamp or write anything.

When you finish, you have a very cute pumpkin.


And there you have it. Maybe not real quick (it takes a little time to score and fold each layer) but definitely worth it.