
 It’s Thursday and time for another edition of Inspiration Station with Becki Adams. Today I have the easiest DIY Christmas ornament idea to share with you! All you need is an electronic die cutting machine (and THIS cut file), patterned paper (I used papers from the I Love Christmas collection by Echo Park Paper), ribbon, two buttons, and some adhesive.
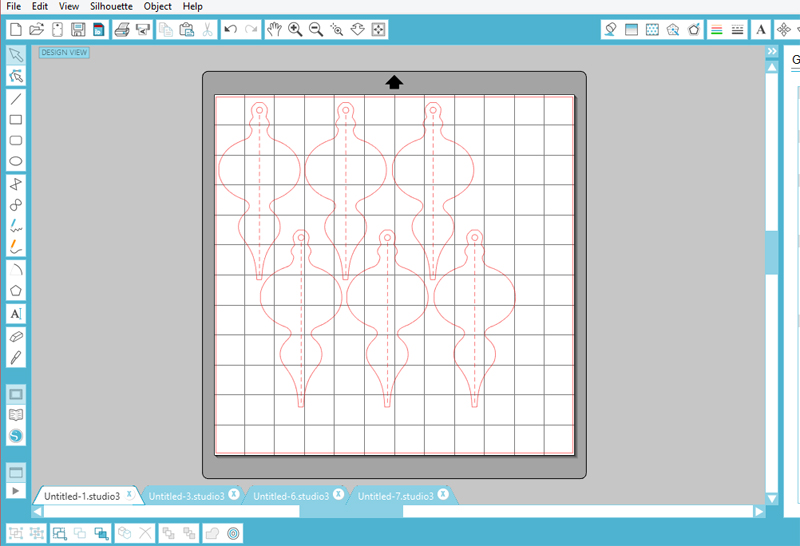
Of course, the first step in creating these ornaments is to cut the pieces out of patterned paper. There are two layers to these ornaments. Make sure you get the right paper with the right layer. I recommend using your busier patterns on the top layer (the smaller ornaments).
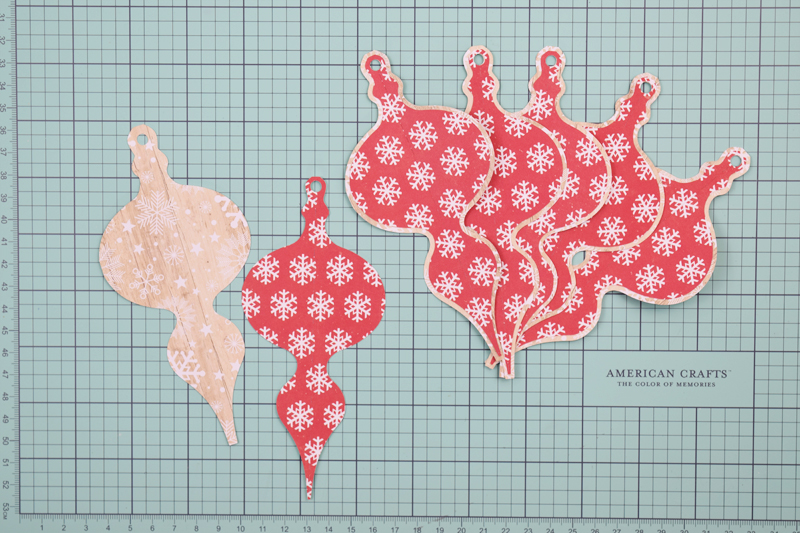
My second recommendation is to layer the patterned papers before you assemble the ornaments. It’s so much easier to adhere the two layers together when both of the layers are laying flat.
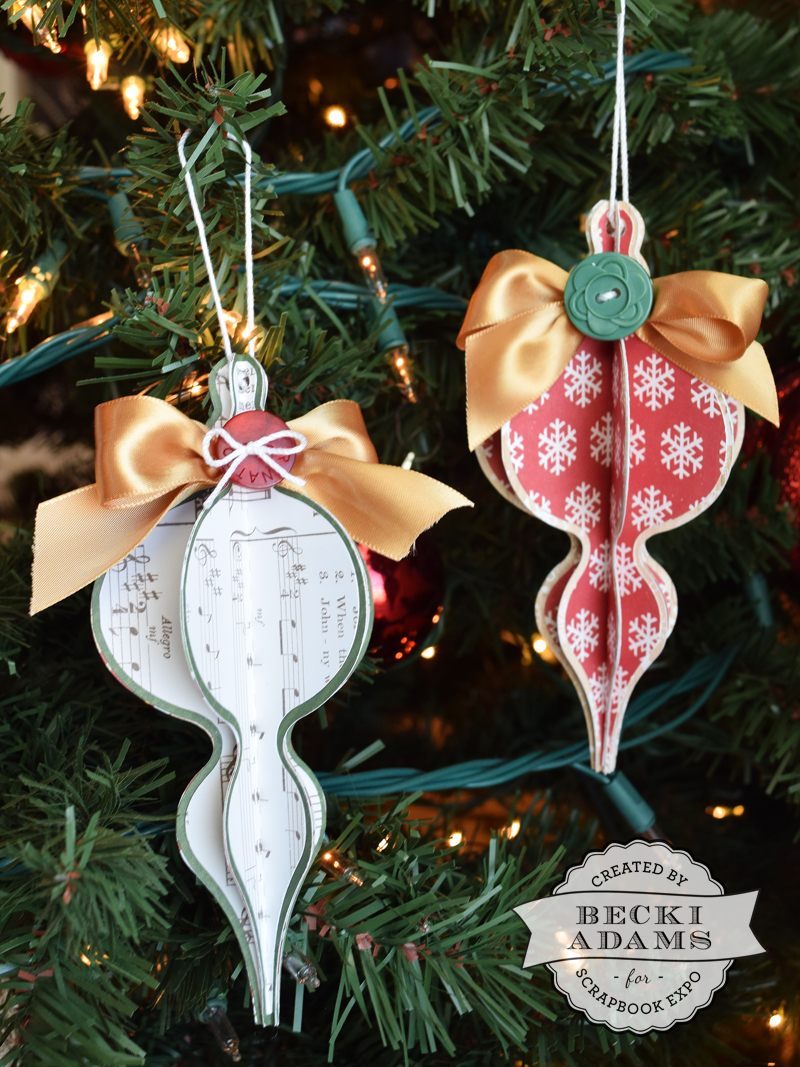
The only embellishment I added to these ornaments was a bow at the top with a button in the center. I chose gold ribbon to coordinate with the patterned papers and buttons to match the patterned papers. I LOVE how these ornaments turned out. I can’t wait to create more of these. These easy DIY Christmas are a perfect project for kids, too. Happy crafting! Thanks for stopping by today and I’ll see you again next Thursday!
How do you assemble them?
In order to assemble the ornaments, you need to fold each piece in half lengthwise and then glue them together with the folded side of another piece until you have created the ornament size you would like. You can use 3 or more pieces. The more pieces you use the fuller the ornaments will appear.
Love all the ideas and “how tos”. It gives me great ideas and the chance to try something new.