Recently I saw a wonderful card by Laurie Willison and it inspired me so much, I wanted to give her scoring technique a try! She stamped her background and then added beautiful score lines with a stylus right over the stamping. I just love how dimensional it turned out. The score lines are so simple, but pack such a punch, don’t you agree? With her permission, I have used her card as inspiration today! Here is her card…
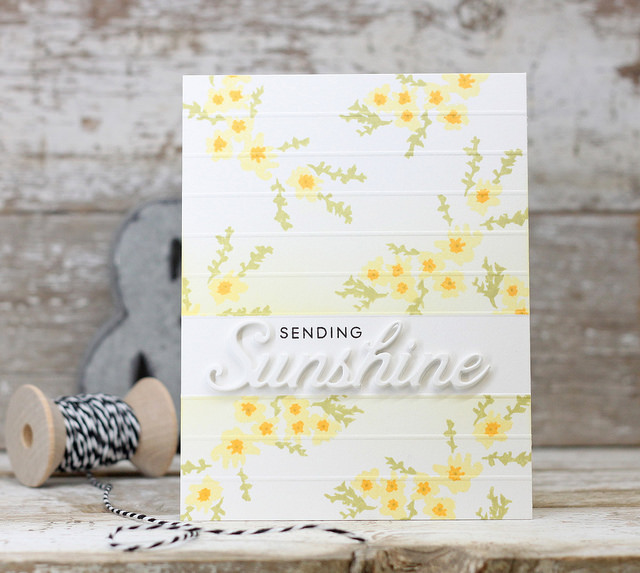
Isn’t it just beautiful? Gasp! So simple and subtle, yet stunning. I wasn’t sure I could do her technique justice, but I wanted to give the scoring a try. It looked easy and fun.
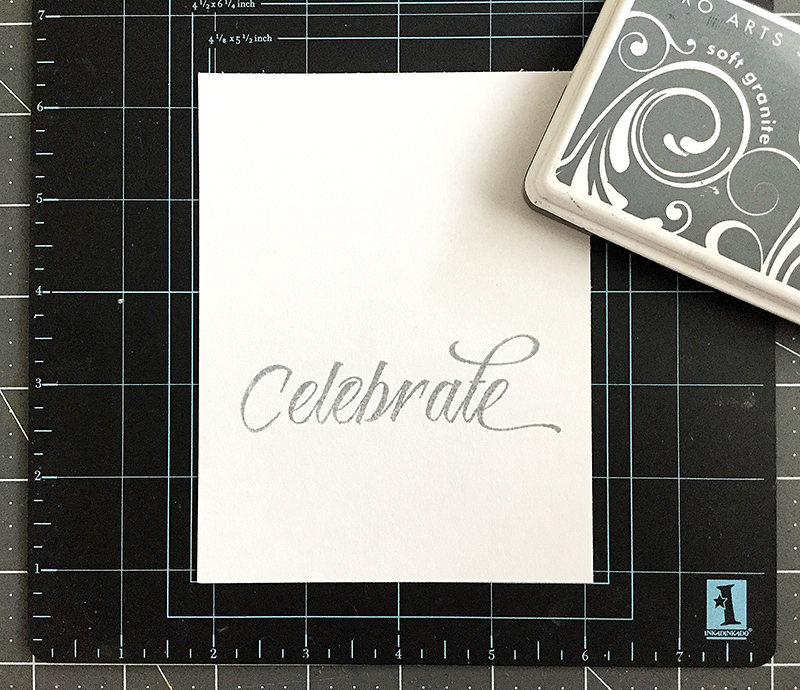
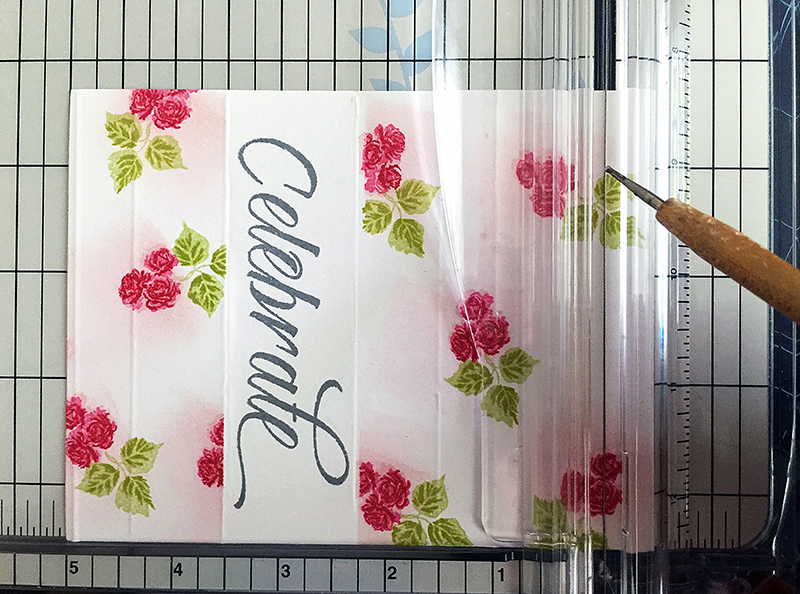
I started with the sentiment, so I could get the placement right for that first, since it is going to be the focal point. I stamped “Celebrate” in gray ink onto my card with the Calligraphy Classics stamp set. I didn’t use a die cut like the sample card, but I do love that raised effect! I may try that next time! Next, I scored the paper just above and below the “Celebrate” with my scoring tool.
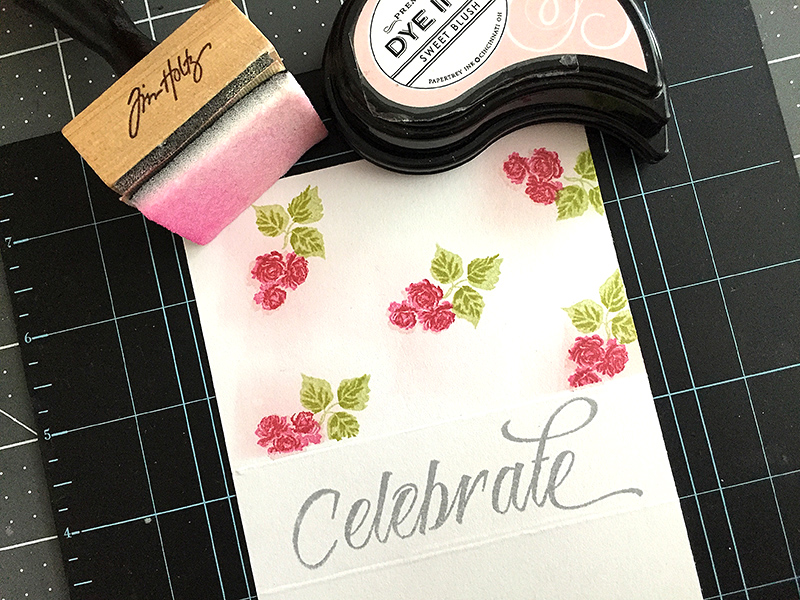
The scored part was then masked off with a scrap piece of paper, then I stamped the flowers and leaves with The Sweet Life stamp set by Papertrey Ink. Next, I used a blending tool and added some Sweet Blush ink over the flowers. It’s a soft look, which you can probably see better in real life, but hopefully you can see it a little bit here! I liked how Laurie blended the yellow ink over her stamped flowers.
The bottom of the card is finished the same way. When all of the stamping was done, I added score lines. I just use my paper trimmer to measure out my lines and score with, but you can use a scoring board if you’d like. I placed the card front where normally the paper trimmer would cut, but instead I use the scoring tool in the crease of the paper trimmer to score the lines. The crease of the trimmer guides my scoring tool perfectly. If you score on the front of the card, the lines will be debossed, not embossed. So you can turn the card front over and just follow your lines again with the scoring tool again. This way when you flip the card front over, the lines will be raised up or “embossed” instead.
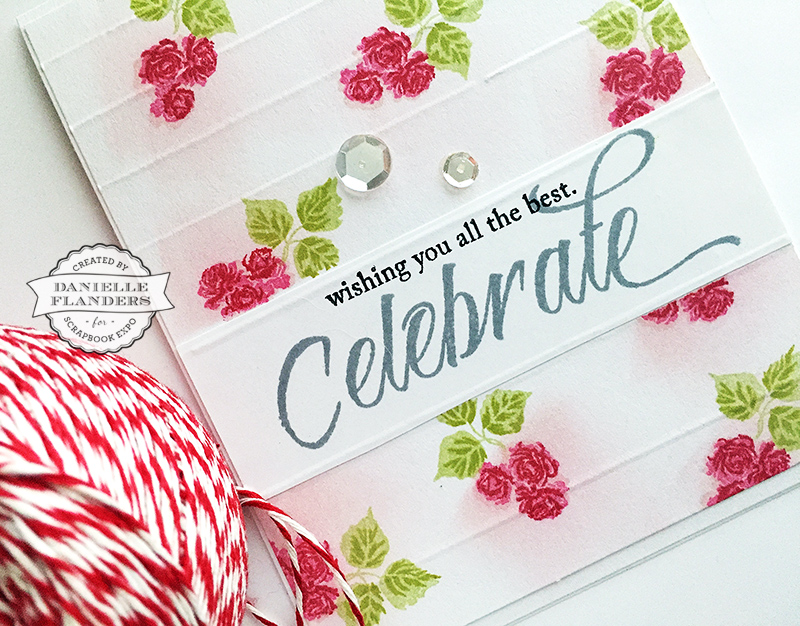
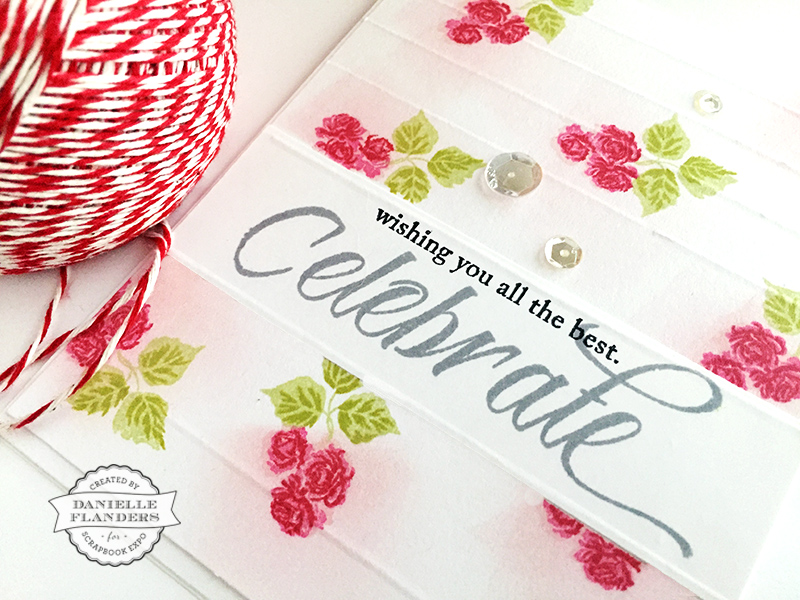
“Wishing you all the best” was stamped with an older stamp set, the Mat Stack 5 Collection stamps, and a few clear sequins were added.
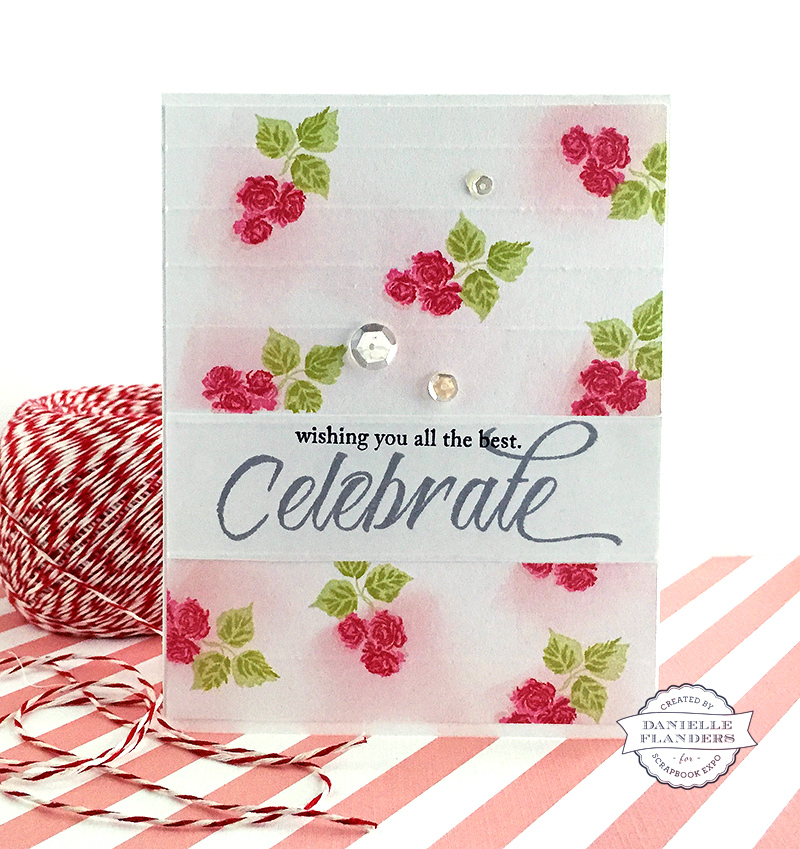
Here you can see the score lines a bit better.
Try score lines on an angle, or create diamonds, or a plaid design would be fun too… the possibilities are endless. I can’t wait to see all of your “scored” background designs! Have fun!
Hi Danielle, this is stunning! I love this technique and the stamp set is beautiful. I love the the blending you did around the flowers, very pretty look. Thanks for sharing and inspiring.
Love this look! Fantastic idea!
What a neat idea! Certainly I would never have thought it, but I will now. Thanks for sharing with us and I love the freshness of your card designs.