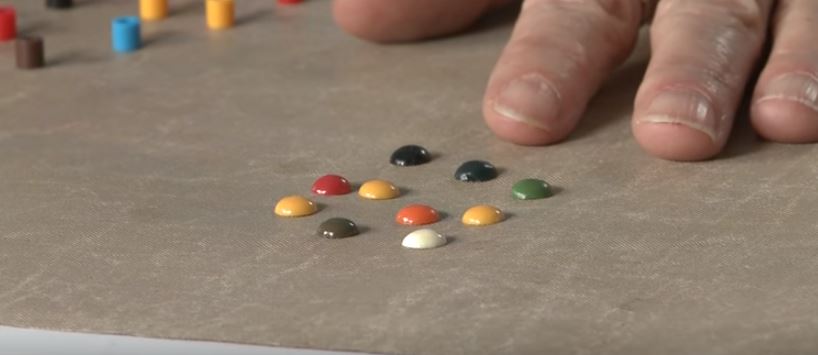
Stamp & Scrapbook Expo instructor Pauline shares a fun tip with us today. Who knew that you could turn your child’s Perler Beads into bright and colorful enamel dots? Watch Pauline’s easy instructions to learn how.
We’d like to thank Pauline for her money-saving tip. You can enjoy more of Pauline’s tips by attending one of her Latest & Greatest workshops at a Stamp & Scrapbook Expo near you. On top of being an excellent instructor, Pauline is known for giving away lots of great products in each one of her classes. You’ll love it!
#SSBE2016 #WeeklyScrapper #ScrapbookExpo
Ooooh, love this tip of the day. Thanks
I have tried this numerous times and it does not work
Hi Linda! I am sorry to hear this has not worked for you. I am not sure why sometimes it is successful and sometimes it is not. I have done this with my kids to make neat crafts and we have had success. It is possible it is based on the size of the perler beads used.
I have tons of these beads from back when I use to teach preschool. I never thought about using them for enamel dots. I used another type of bead, but it wouldn’t always turn out round. Thanks for sharing!
These are lovely! But be sure to do this in a well-ventilated area – kitchen window open, in the garage with a toaster oven, etc — the plastic off-gasses as it melts and the fumes are nasty!
I tried this a couple of days ago. It worked very well on most of the small Perler beads. A couple in each batch did not melt perfectly. I tried at 375 degrees F but didn’t leave it in nearly as long as the video suggested. It took only 15-20 minutes. I tried one batch with a couple of the Perler “biggie beads” in the same batch as the small beads. They melted with a small indentation in the center. I think they would have come out better if I left them in the oven longer, but did not want to over cook the small beads. Thanks for the idea! I will try to perfect the large beads next weekend.
I have done this numerous times and am glad to say I have around 6,000 little sweeties to add to my cards. I have done both the little Perler beads and the bigger Pony beads. I put them on a large cookie sheet with parchment paper, let them cool and they slide right off. The Perler beads have very little smell. I cooked them at 275* for around 30 minutes. The Pony beads at 400* for 8-10 minutes. Each oven is different. Turn tray at the half-way point to make sure all cook same. I bought the Perler beads in bags of 1,000 in different colors so I did one color at a time so the colors were already separated when I went to store them. I also bought the big jug type to get extra colors and did those in a mix for each batch. Also, the Pony beads will continue to spread the longer you cook, but the Perler beads will not. Hope this helps.
Great idea! Thank you for sharing!
I found that it worked MUCH better when you used a glass baking pan. Cookie sheets caused too much of a burn that changed color of the Perler bead. This is very tedious, but works really well. Also be very careful, because the glass pan gets super hot!
Great idea! In the past I’ve cut off the shank of small domed plastic buttons and painted the buttons with several coats of glitter nail polish to achieve the glitter look with quite a bit of depth and the polish comes in many colors so I can get the color I want no matter what color the button is. I’m going try it on the melted pony beads.