
Hey, everyone! Roree here with another Make It! Monday project. Today I am sharing a fun gift card holder using an Origami paper-folding technique.
First, I started with a sheet of paper that was twice as wide as and four times as long as my gift card.
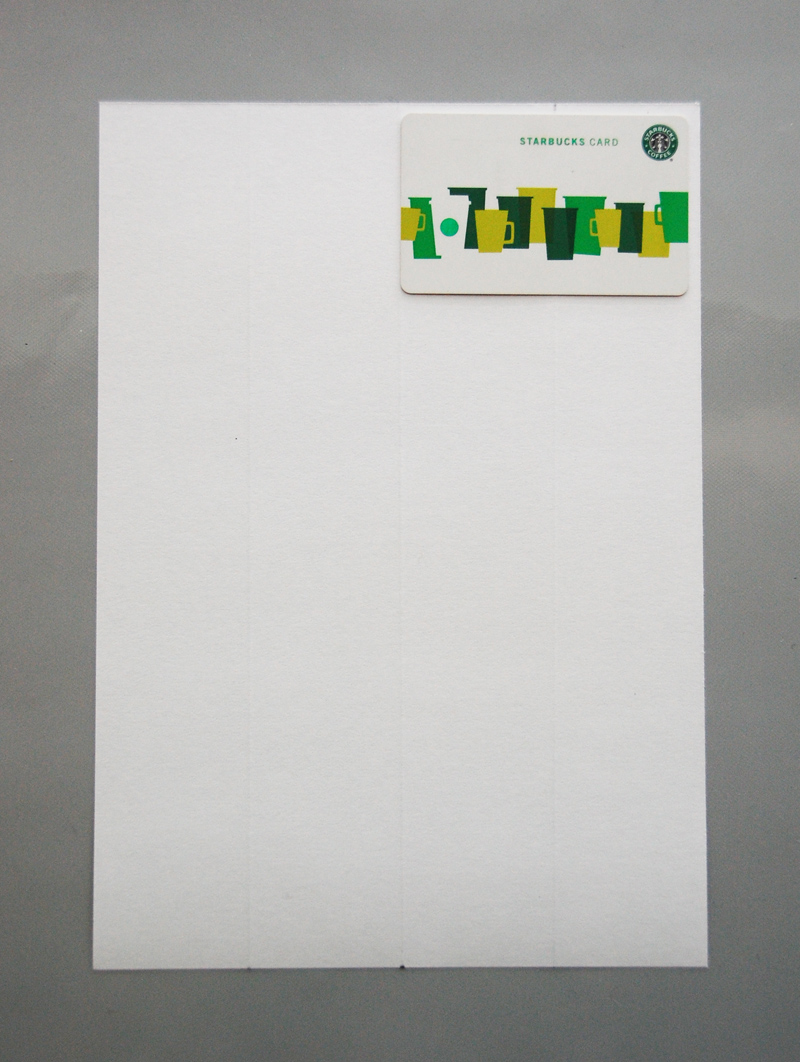
The gift card measured around 2 1/4 x 3 1/4″. I wanted the slot for the gift card to be slightly larger so I set my card measurement at 2 1/2 x 3 1/2″. Taking these slightly larger measurements into account, I started with a 7 x 10″ sheet of paper.
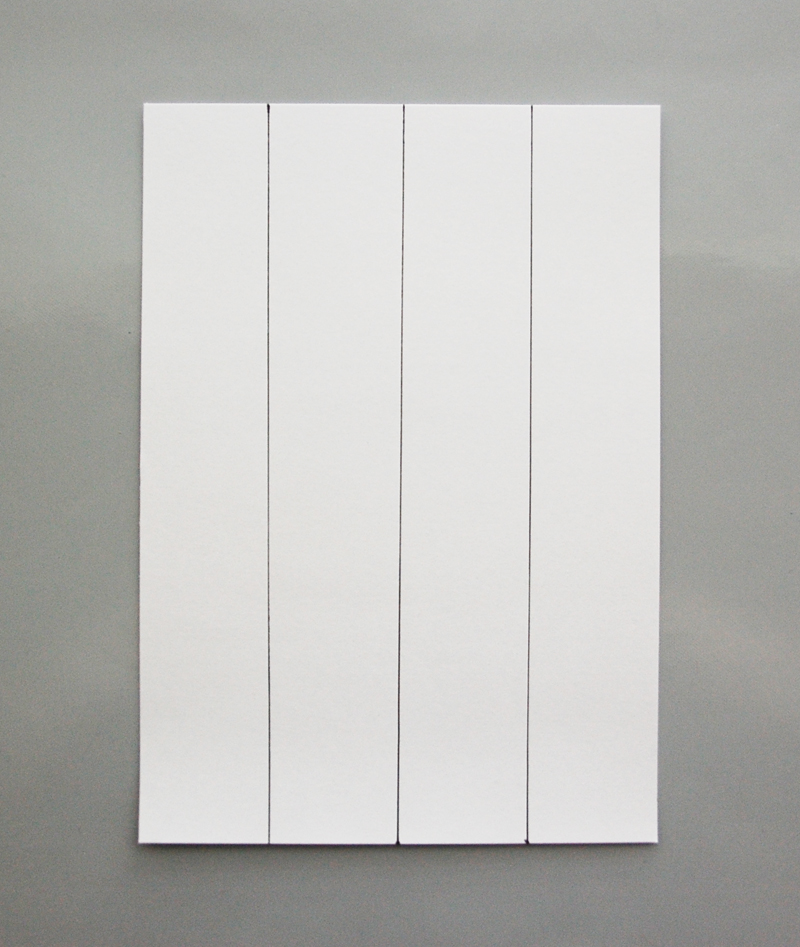
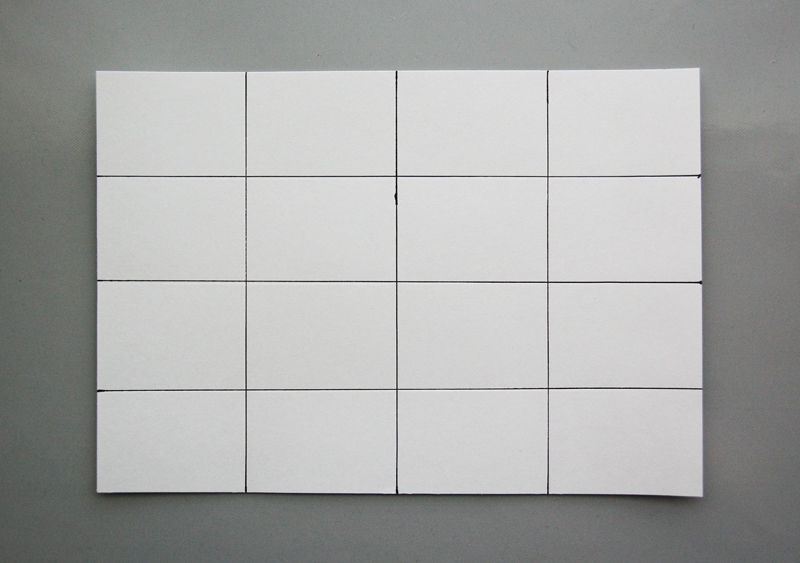
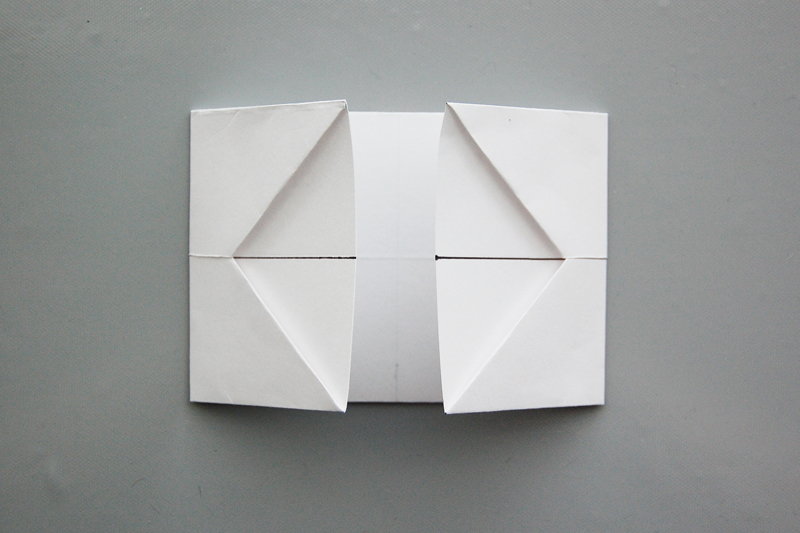
I scored the sheet vertically at the 1 3/4″, 3 1/2″, and 5 1/4″ marks. (Each scored panel is 1 3/4″ wide.)
I then scored it horizontally at the 2 1/2″, 5″, and 7 1/2″ marks. (Each scored panel is 2 1/2″ wide.)
I folded in the corners to the scored lines.

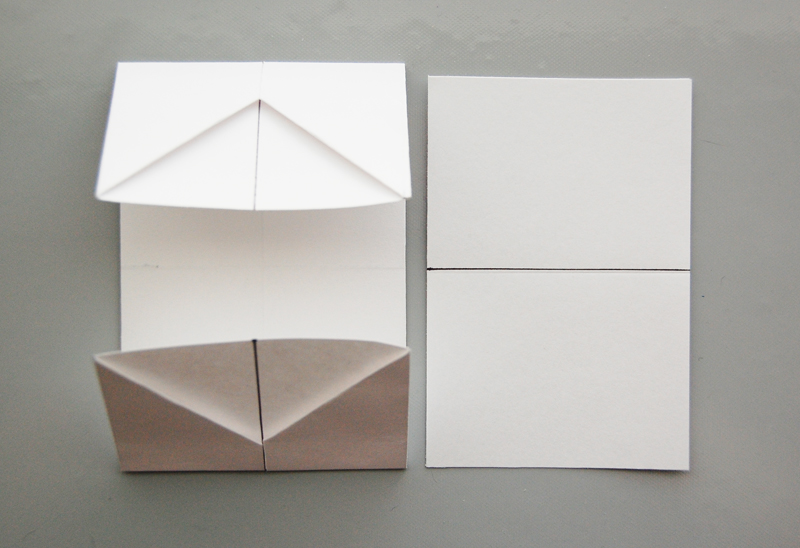
I then folded in the outside panels horizontally.

I folded in the outside ends vertically so that the ends met in the middle.
I cut a separate sheet of paper slightly smaller than the folded gift card holder and scored it at the center.
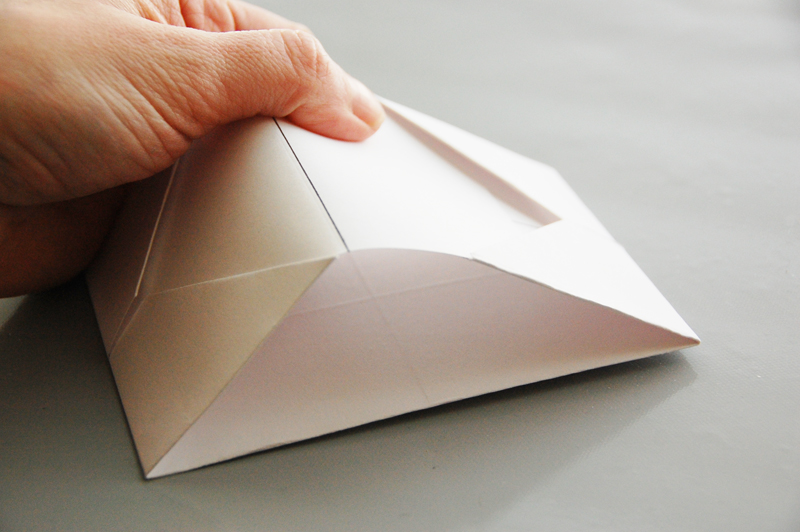
I inserted the panel in the slots of the gift card holder to hold the ends together.
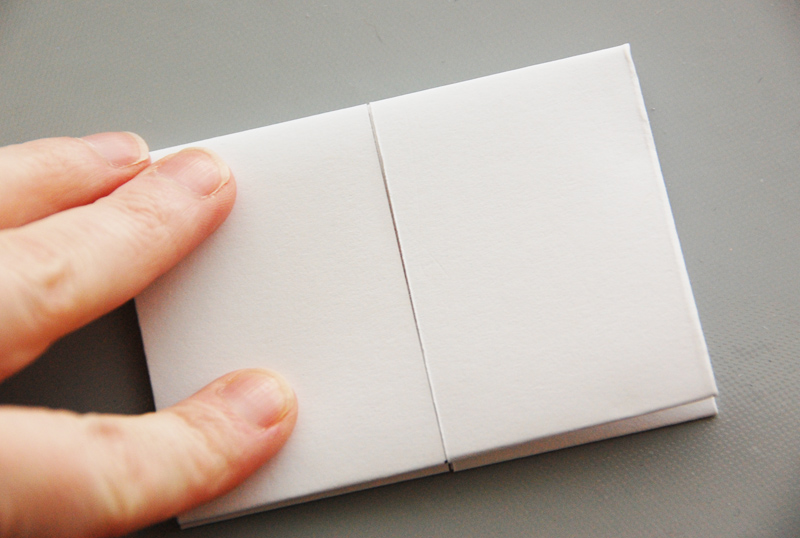
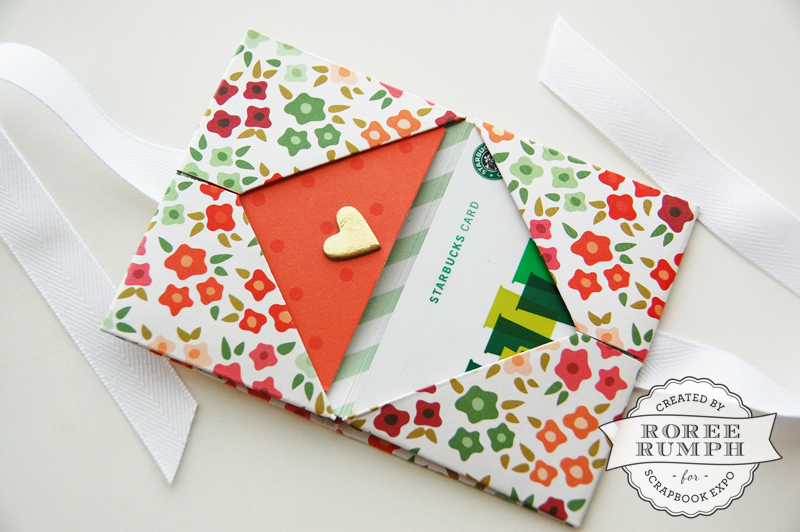
I put my gift card in one of the slots and folded the gift card holder in half to finish.

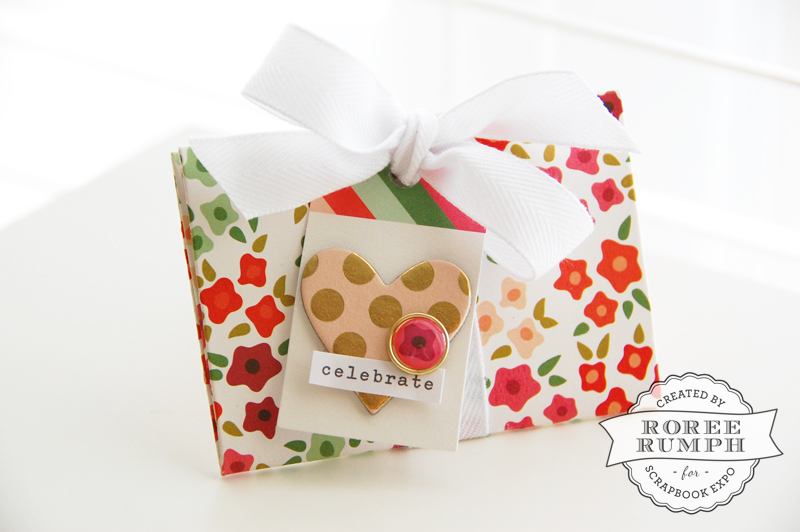
I recreated the gift card holder with patterned paper and embellishments from My Mind’s Eye brand-new On Trend 2 collection.

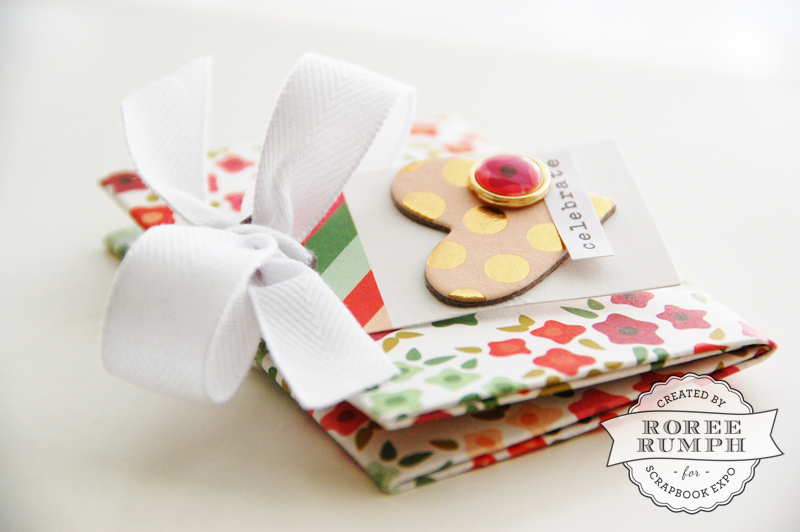
I added some adhesive to the outside and attached a strip of ribbon along the center of the gift card holder.

I added the gift card in one side and a little note card on the other side.
I folded the gift card holder closed, added a tag, and tied the ends of the ribbon together in a bow to finish.
I hope you enjoyed today’s Make It! Monday project. Thanks so much for stopping by!
Love it !! Gonna try it. thanks
Very clever and I liked your excellent description and step-by-step details. ?