Spellbinders Card Creator Tutorial from The Rubber Cafe

Thanks to The Rubber Cafe for this great tutorial!

Hello!  My name is Debbie Seyer and today is my first official day posting here at The Rubber Cafe‘.  I am so excited to be on such a great team!

One thing you will find out pretty quick about me is that my first love is to make cards.  I still scrapbook and do some mixed media projects but my first love is definitely cardmaking.  Because I always have extra cards sitting around, my friends and family will treat my craft room like it’s the Hallmark store…LOL!!

For this reason, I never just make one card.  I have learned to make at least 4 of each card I make.  Today I will show you my process for making 4 cards the easy way!

I picked out the die templates I wanted to use first.  I decided to use the A2 Matting Basics A and A-2 Polka Dots die templates from Spellbinders Paper Arts new Card Creator line.  Here are the ones I decided on.   Since the Base Plate is so big, I can cut/emboss everything I need for a card at one time!

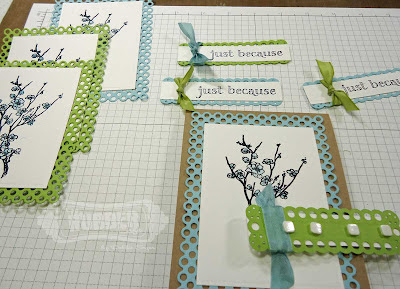
Here is what my dies look like after cutting and embossing!
Now I need to stamp the image and sentiment on the corresponding die cut.  I picked the Blossom Branch stamp for my main image.  The sentiment is “Just Because” stamp.  
I stamped the image using Staz-on onto some Neenah Solar Crest White.  I used my Tumbled Glass distress marker and a water brush to color the image.  I did everything assembly-line style so that I could get it all done faster!  LOL
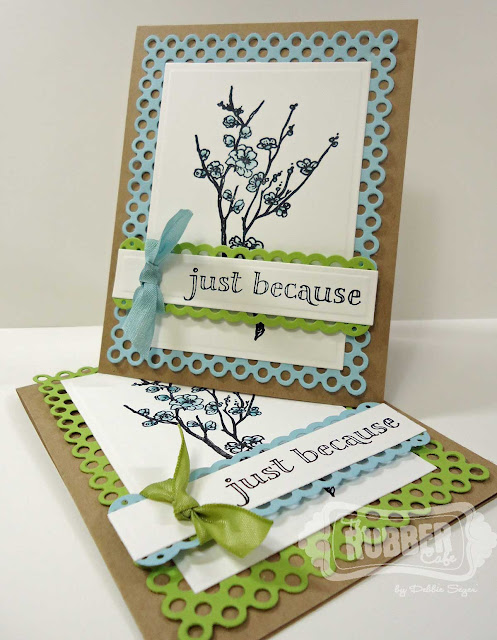
I layered everything together and added the ribbon to the senitment panels.  Now all I have to do is put these pieces together on the base of Kraft cardstock and I am all done.  Here are my finished cards!

I am sure these cards will disappear pretty fast at my house.  I just love how quick and easy these came together.  Plus I think they are so pretty!  Thanks for reading along with me today!

Supplies:

Stamps: The Rubber Cafe’ – Blossom Branch stampJust Because

Ink: Stazon- Tuxedo Black, Rnager Distress Markers-Tumbled Glass, The Rubber Cafe’ – water brush

Paper:  Neenah Solar Crest White, Kraft Cardstock, misc pale blue and moss green cardstock

Tools: Spelllbinders Card Creator Line- A2 Matting Basics A and A-2 Polka Dots die

1 thoughts on “Spellbinders Card Creator Tutorial from The Rubber Cafe

Comments are closed.