Hey, everyone! Roree here with another Make It! Monday project. Today I am going to show you how to create a beautiful flower with strips of ribbon, a few punched circles, and a button and some thread.
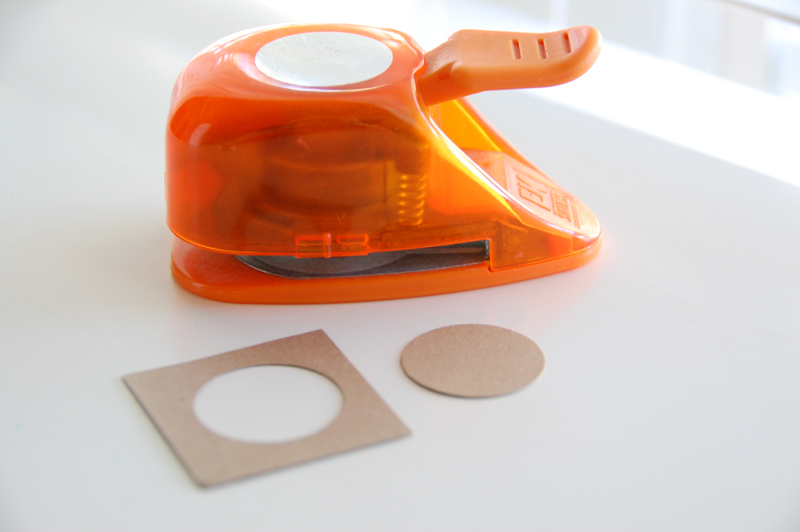
First off, get your supplies together. You will need ribbon, a circle punch, some paper scraps, a button and thread, and your favorite adhesive.
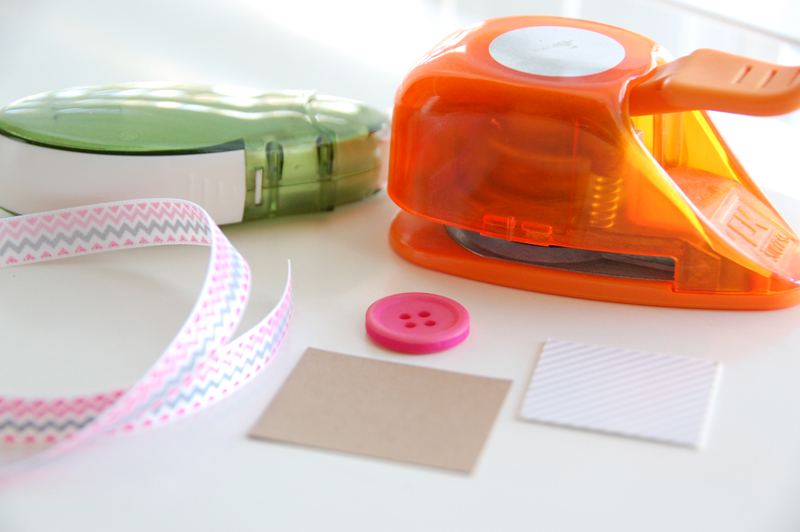
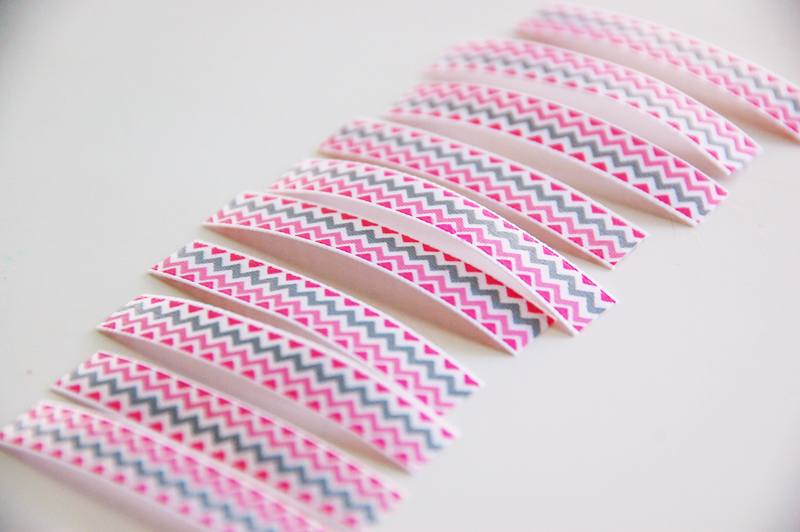
Cut your ribbon into strips. I cut mine to 2″ lengths.
Punch circles from your scrap pieces of paper. I cut two circles from kraft cardstock and one from striped patterned paper using a 1″ circle punch.
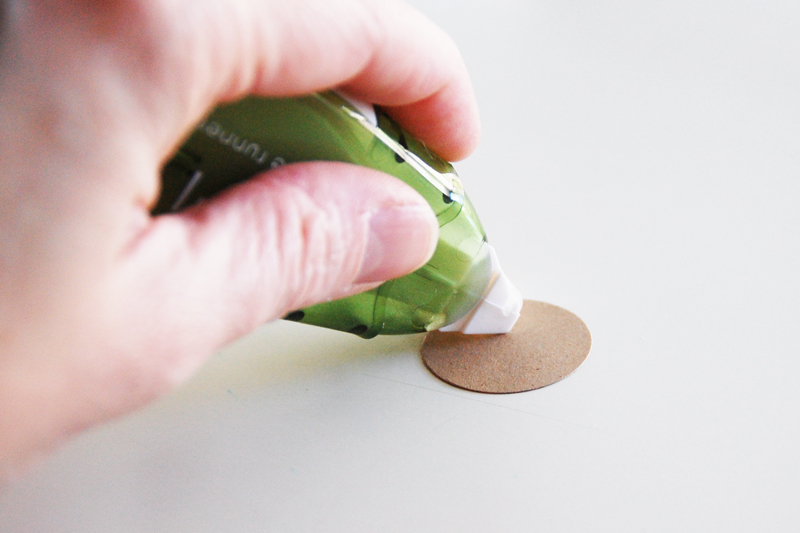
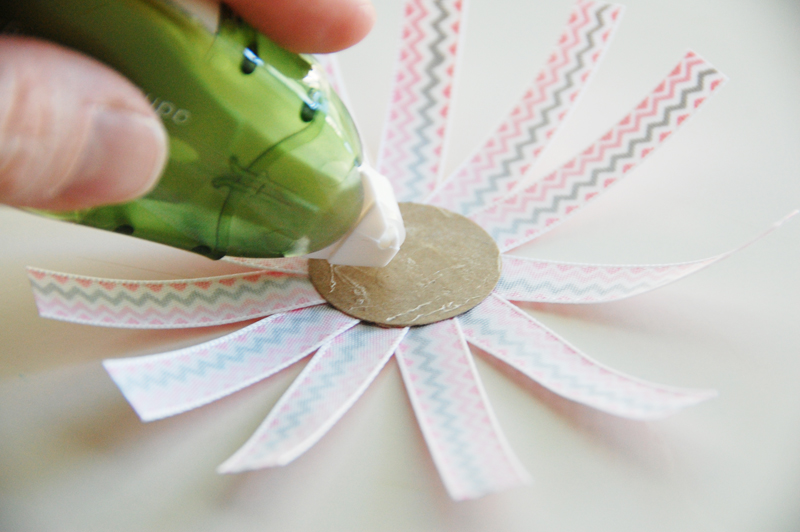
Add adhesive to one side of one of your circles.
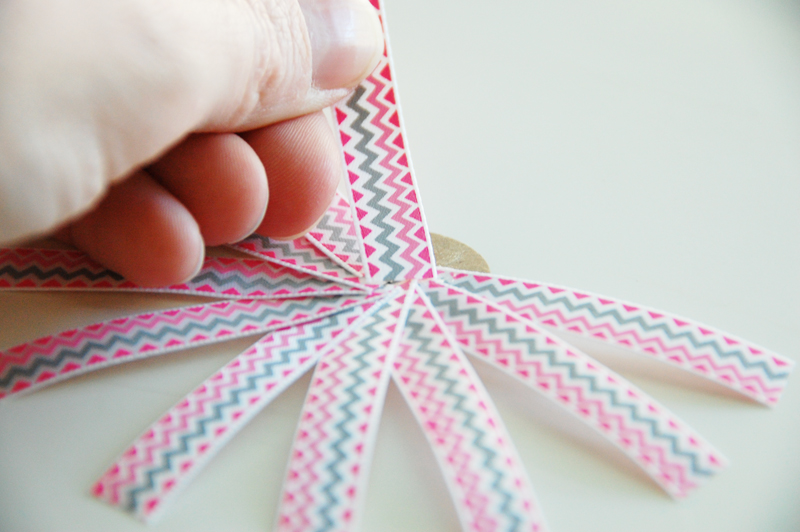
Add the strips of ribbon around the circle, layering the ribbon and adding more adhesive as needed.
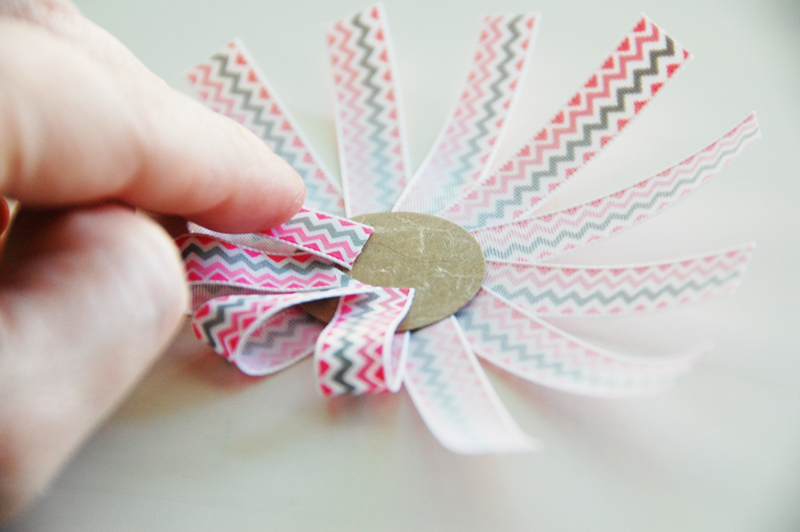
Flip over the circle and add adhesive to the other side.
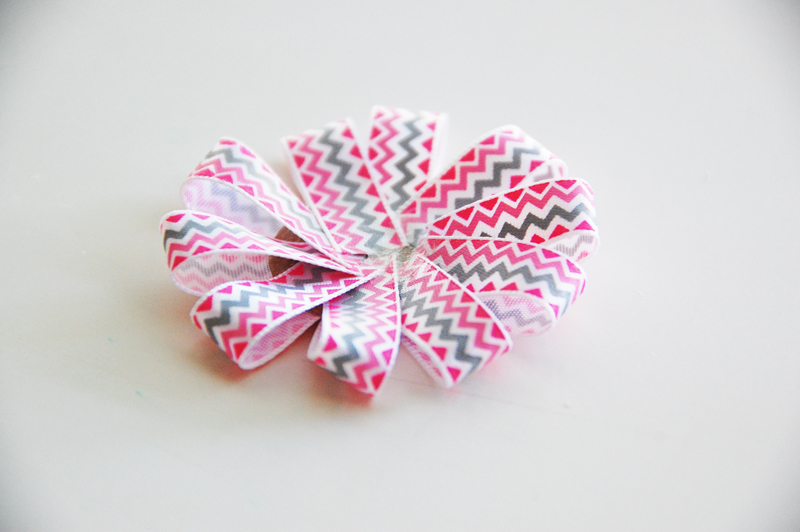
Fold the ribbon strips over and attach them to the other side, looping the ribbon and adding more adhesive as needed.
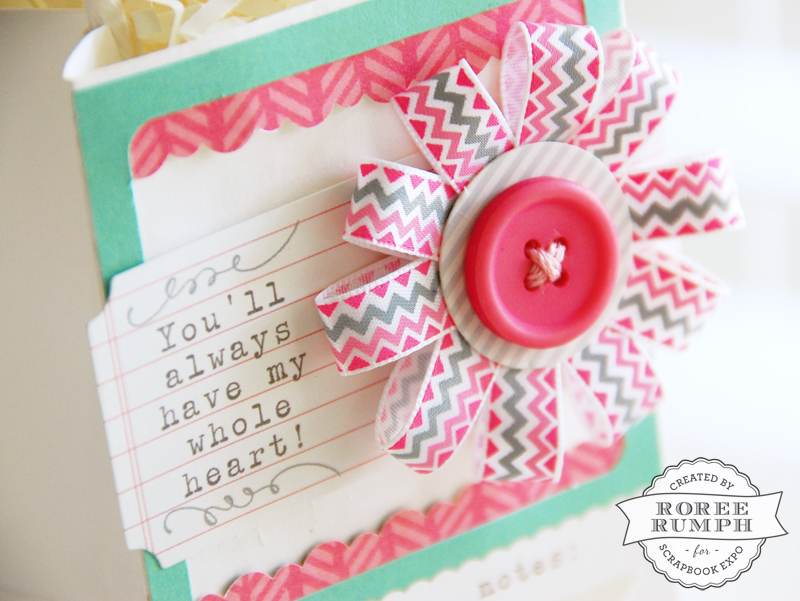
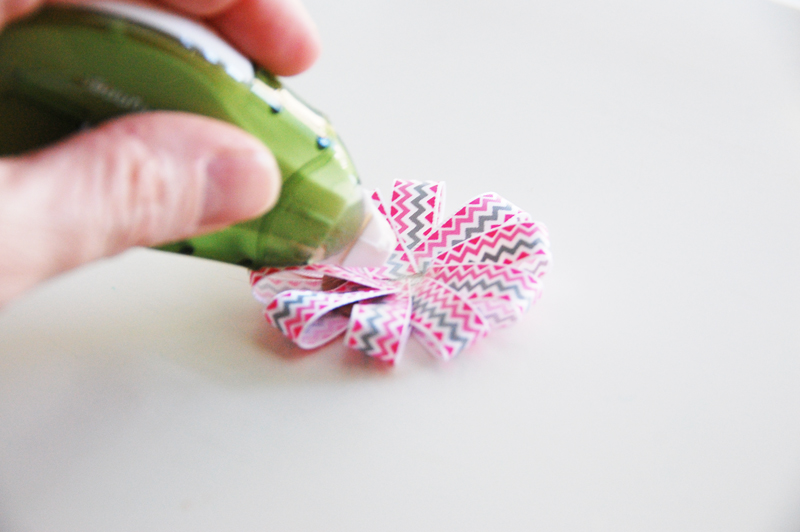
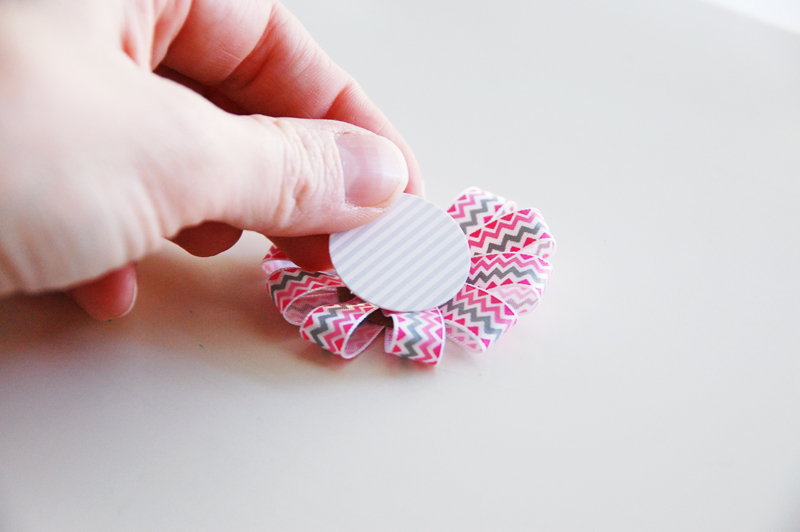
Add adhesive to the center and attach a coordinating punched circle to the center of the ribbon flower.
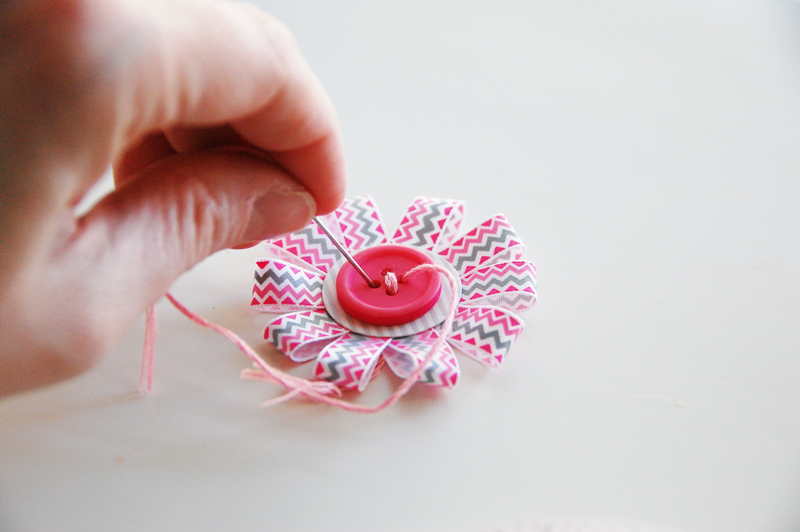
Stitch a button to the center of the flower with a coordinating thread.
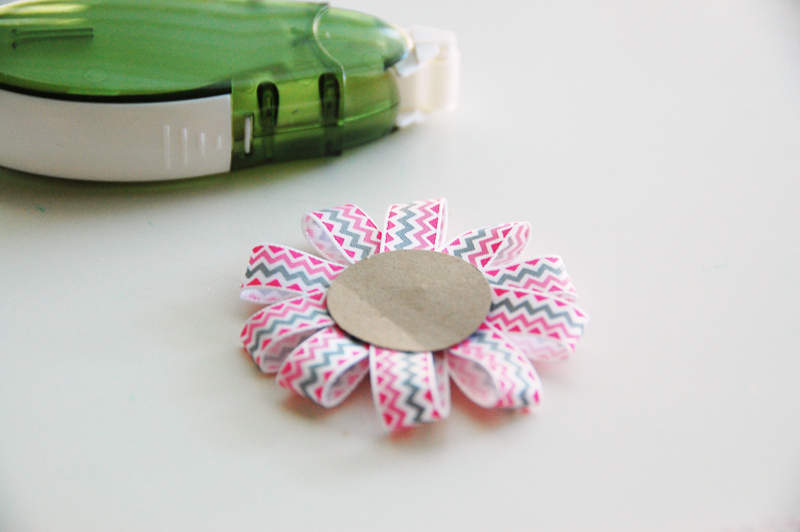
Adhere the last punched circle to the back of the flower to finish.
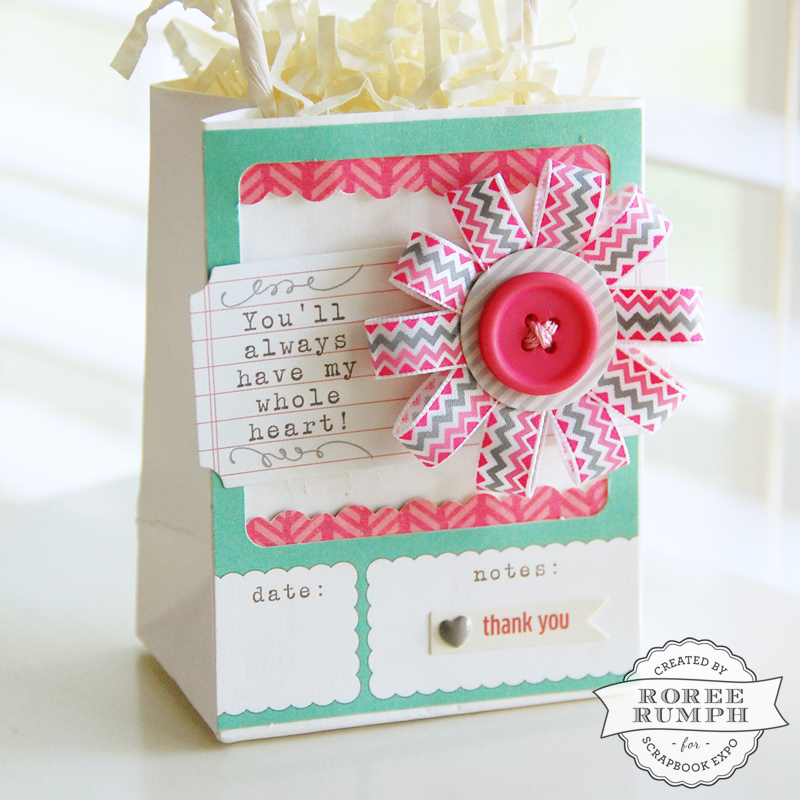
All that is left is to add the flower to your project!
I hope you enjoyed today’s Make It! Monday project. Thanks so much for stopping by!
Great ribbon/flower embelly! Will def make a few of these. Thanks for sharing!
Thanks, Rose Marie!
I love this project.
I am so glad you liked it, Rosalind!
Nice to see a flower embellishment that is as pretty as it is simple to make. Thanks for sharing!
Thank you for the sweet compliment!