Amy Heller shows us step-by-step how she put her layout together. Thanks Amy!
Make It Sunday with Amy Heller
Hi everyone! I’m Amy Heller and I’m thrilled to be joining you today on the Elle’s Studio blog for Make it Sunday! I was a part of the Winter 2010 Design Team, and it’s just so fun to be back today!
A little about me….I’m a WAHMomma of two fun kiddos, ages 6 and 9, and a wife to my hubby/best friend for the past 12 years. I am a graphic designer by trade and a scrapbooker & card maker by passion. 🙂 I currently work for Two Peas in A Bucket, as a Garden Girl, and am super lucky to also work with American Crafts and October Afternoon on their Design Teams as well. I’ve been scrapping since 2004, but didn’t get really serious about it until about 2008, when both my kids had moved past the diaper age. 😀 Since being on the team here for Elle, my blog has moved to www.amyheller.typepad.com.
When Elle sent me the latest collection of tags for the summer, I was SO excited! The colors, textures, and new sizes and shapes are SO much fun, and I couldn’t wait to get started playing with them.
Here’s how this layout came together:
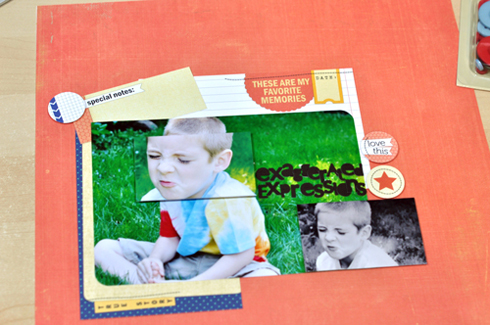
I started this layout with a photo that I was working on, and this beautiful red/orange paper for my background. I knew I wanted to use a LOT of tags on my page, so for now that’s all I pulled out.
I used two of the large journaling spots for my “background” paper and layered them in two different directions. Honestly, I’m never bothered by pieces like this (blue) that are set sideways or even upside-down. Especially if they aren’t the feature of the page. This was nice like this because the yellow tag at the bottom, actually pushes the eye upward to the the face in my picture which, is the focal point of the entire page.
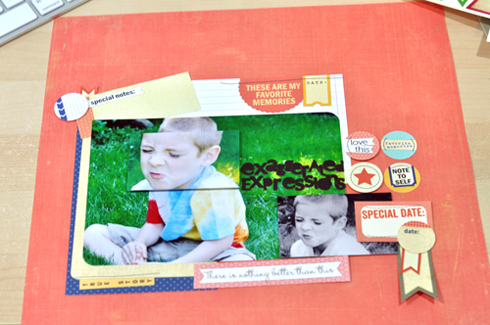
Next up, I started pulling out like-colored pieces in various smaller shapes and sizes, and began filling in “holes”.
Things were beginning to come together here, so I added a couple more of the tiny tidbits on the right, then layered up a date tag with some cute banner pieces layered up on top to provide dimension.
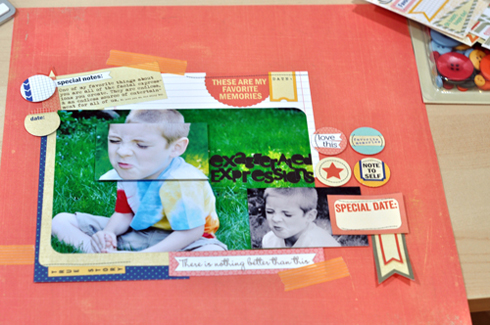
Once my page was nearly complete, I adhered everything down, typed up my journaling, added some fun pieces of washi tape and began planning for my completed page.
Here’s where things didn’t turn out as I anticipated. At this point I took a dark ink and did some splattering up in the top right and lower left-hand corners – I detested it. LOL! So, I trimmed this piece out, and using the additional piece of this paper that I had, created a “new” background, sans ink splatters. Instead substituting the vacant spaces with tone on tone cut outs from my Cameo, then I covered up the overlap in paper with the ribbon. All part of being a scrapper, right!? I was just happy none of the ink got on my adorable tags!
And it all worked out in the end, and I’m so happy for that little mis-hap, because I love the end result! 😀 Thanks so much for joining me today! You can find all of the new Summer Tags here on the Elle’s Studio website!
Blog Post: http://ellesstudio.blogspot.com/2012/06/make-it-sunday-with-amy-heller.html


