Hey, everyone! Roree here with another Make It! Monday project. Today I am going to share with you a heat-embossed watercolor card—perfect for sending a little encouragement or even a happy hello.

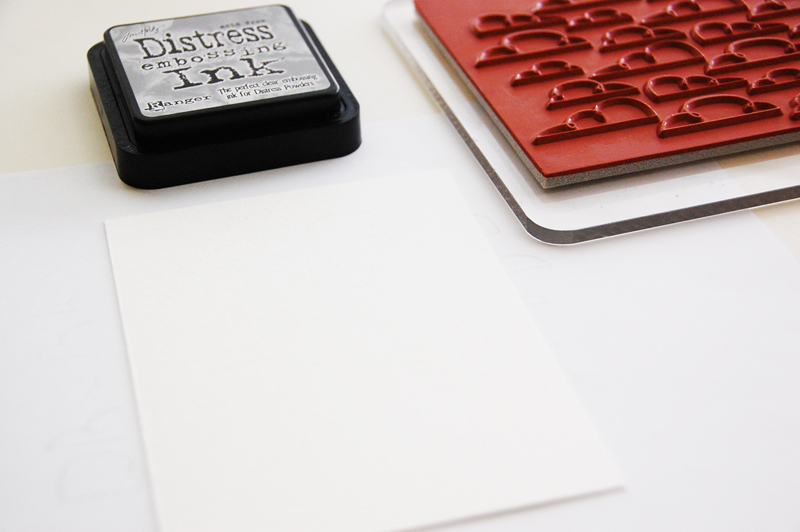
To re-create this card, you will need: watercolor paper, a background stamp (October Afternoon’s Saturday Mornings Background Stamp), an acrylic block, embossing ink (Tim Holtz Distress Embossing Ink), silver embossing powder (Stamp A Mania), watercolor paint (Ken Oliver Crafts Ultramarine Blue Color Burst Watercolor Powder), a brush (Niji Waterbrush), and an embossing heat tool.

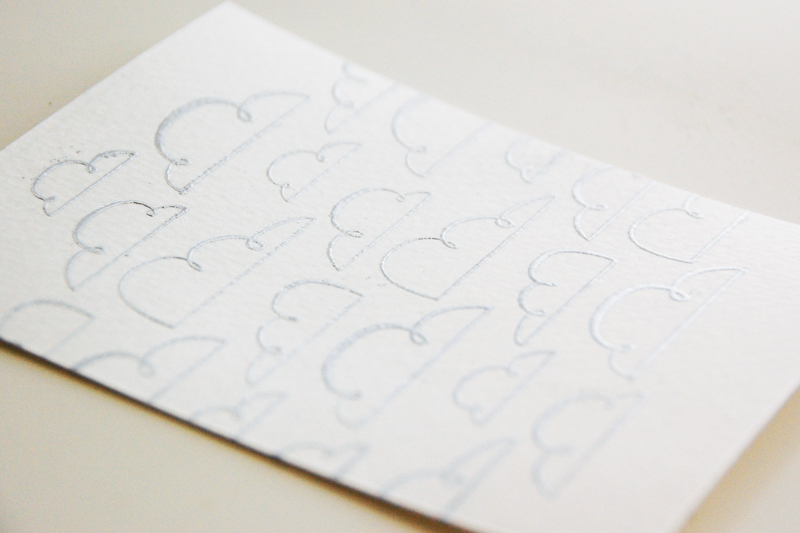
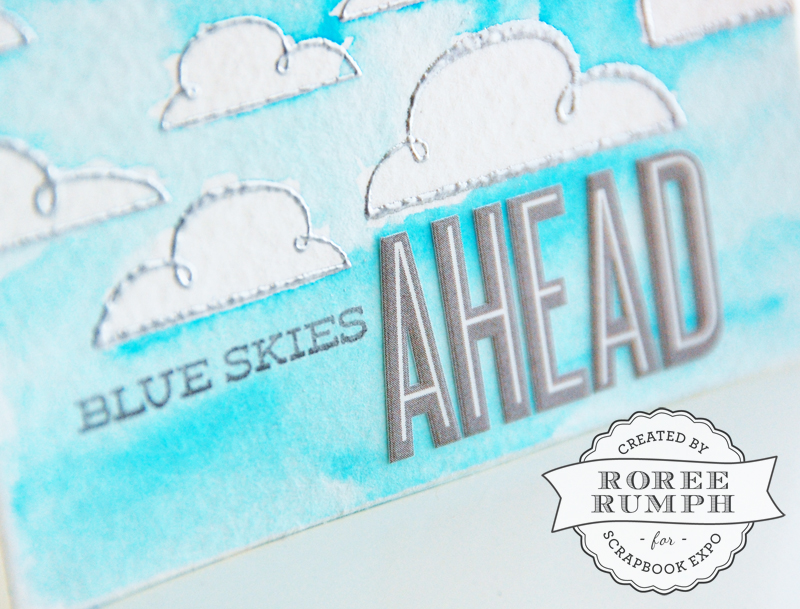
First, add embossing ink to your background stamp and stamp the image onto the watercolor paper.
Sprinkle embossing powder over your stamped image, then shake off the excess. (Do this over a larger sheet of paper or paper plate, so you can put the excess powder back into the container for future projects.)
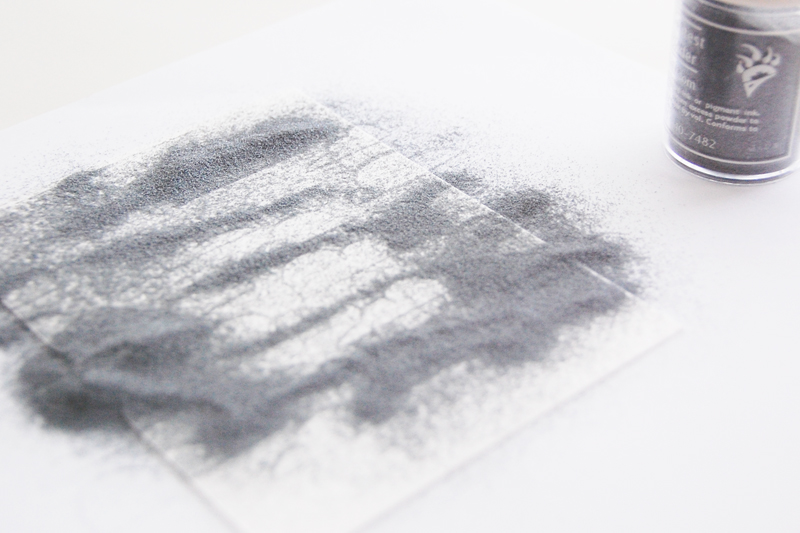
With your embossing heat tool, go over the stamped images to heat the powder and create raised metallic images.
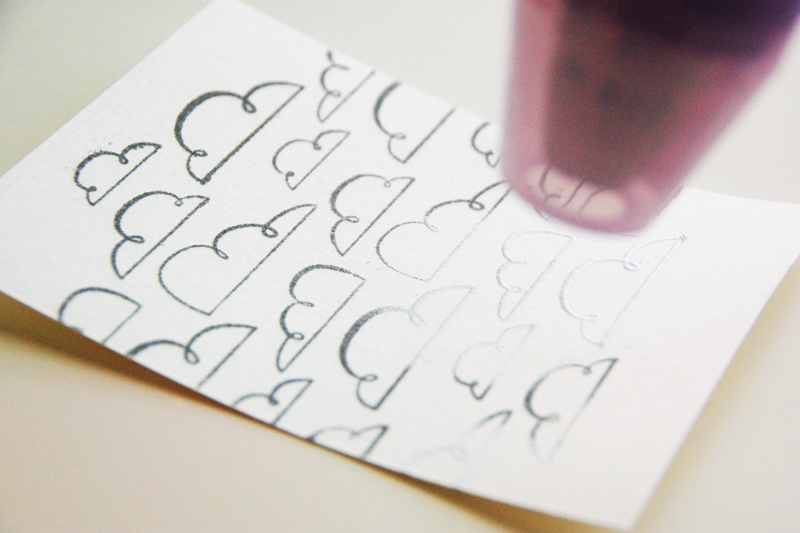
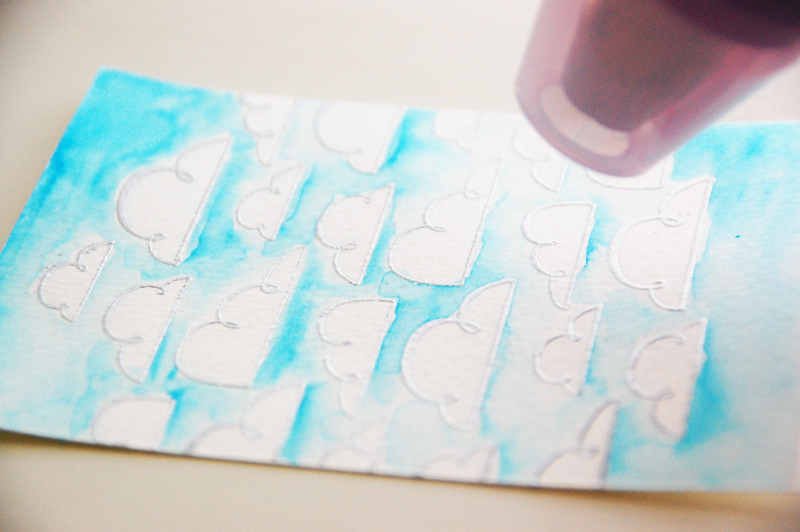
Paint around the images with watercolor paint.
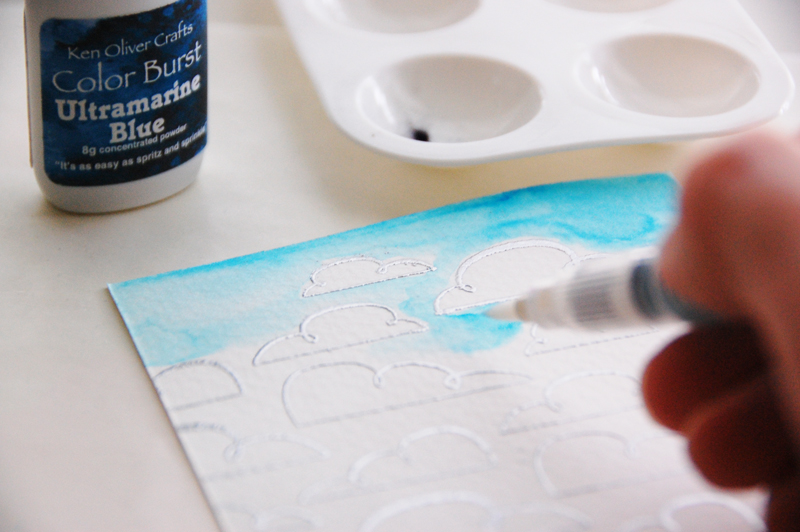
Use your embossing heat tool to dry your painted image.
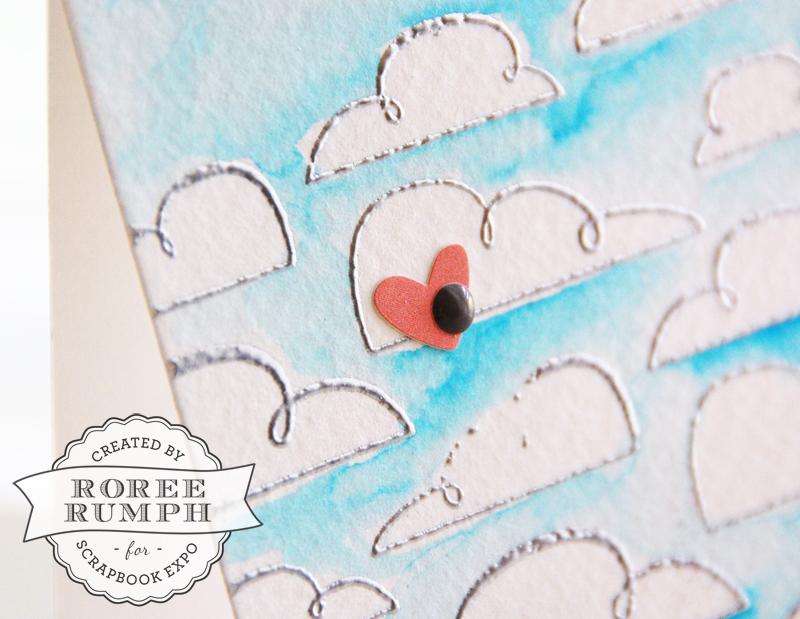
All that is left is to add some embellishments and adhere your watercolor panel to the front of a card.
I hope you enjoyed today’s Make It! Monday project. Thanks so much for stopping by!
New to cardmaking, but can’t wait to try this heat embossed watercolor card. Very creative.
Thanks, Marilyn! So glad you like it.