
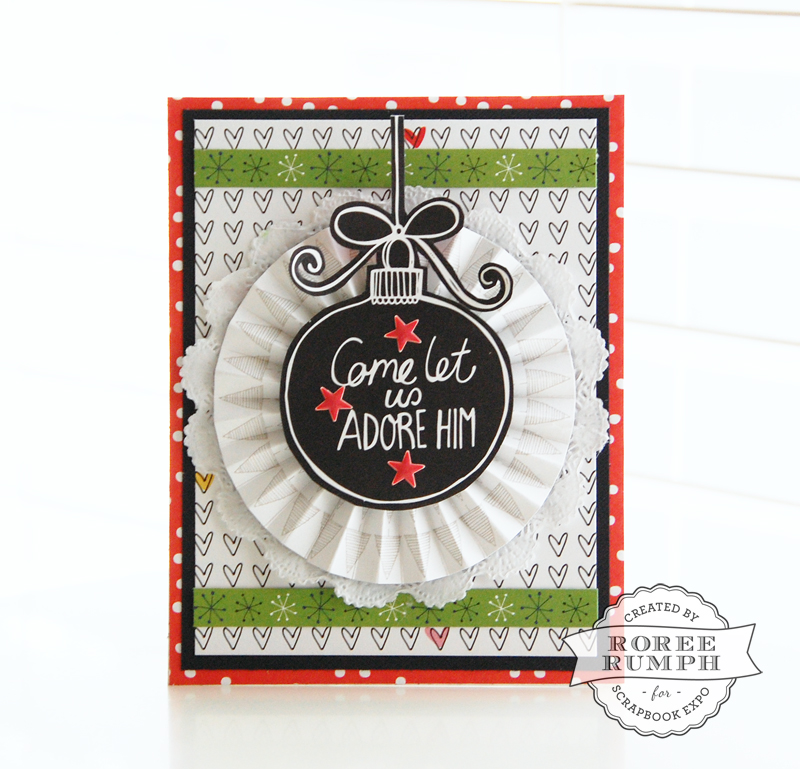
Hey, everyone! Roree here with another Make It! Monday project. Today I am sharing a card I created with a rosette frame to highlight a hand-cut Christmas ornament.
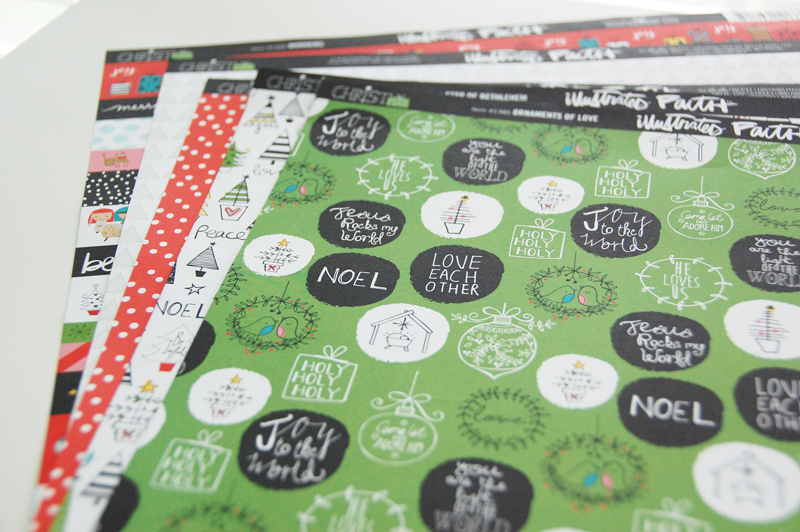
I started with papers from Illustrated Faith‘s Christmas collection from Bella Blvd.
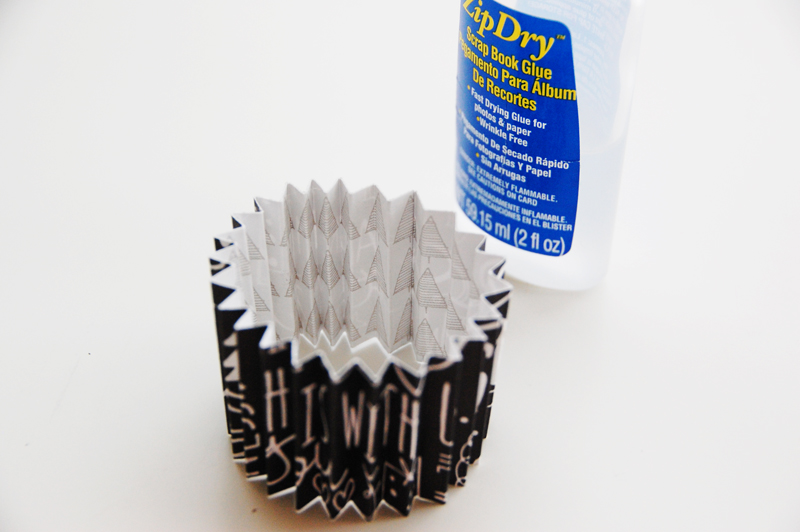
I cut a 1 1/2 x 12″ strip from the Greatest Gift Paper and scored the strip at each 1/4″ mark.
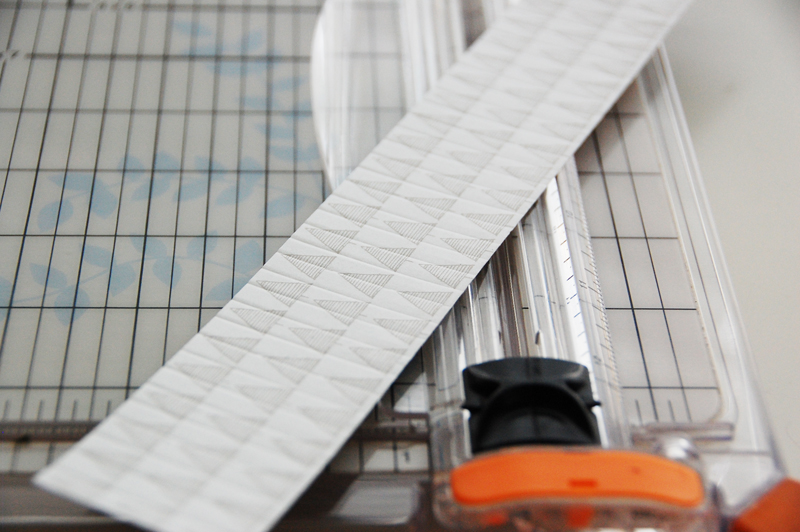
I folded the strip at each score line, creating pleats.
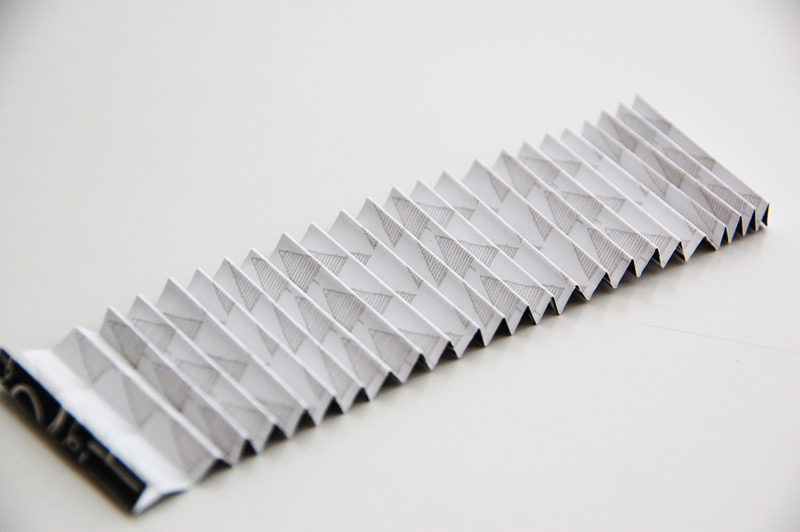
I adhered the ends together with a strong adhesive. (I like ZipDry by Beacon Adhesives.)
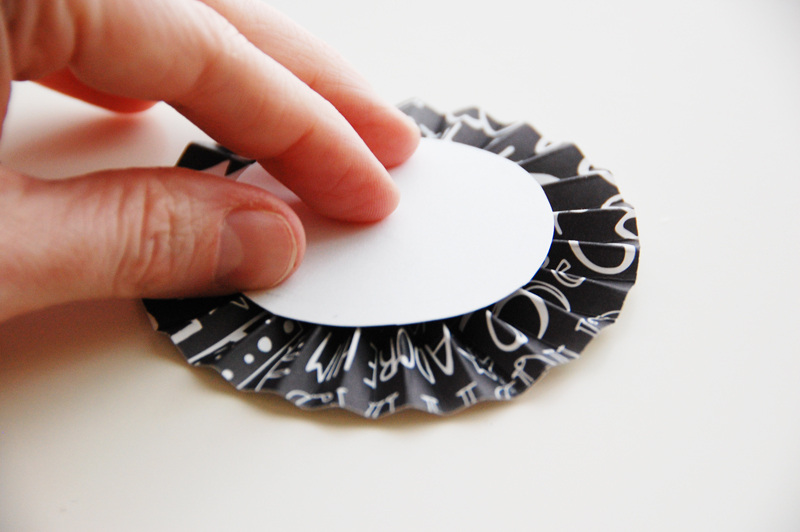
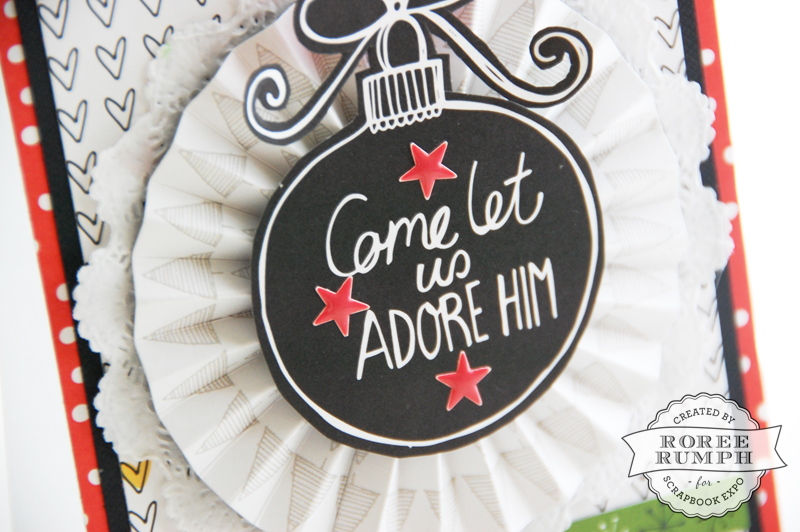
I pushed the pleated paper into a rosette shape and adhered a circular piece of cardstock to the back of the rosette to hold it in place. I placed an object with a little bit of weight (my iPhone) on the rosette to hold its shape while the adhesive dried.
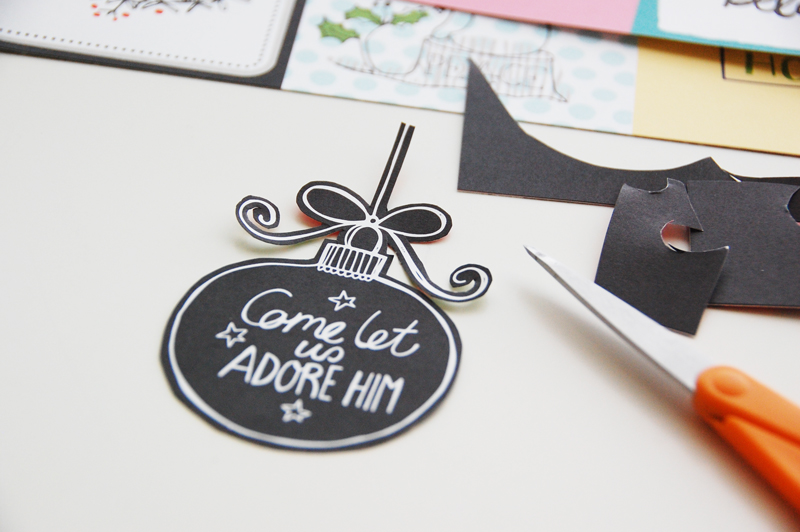
While it was drying, I hand cut an ornament from a journaling card on the Borders Paper.
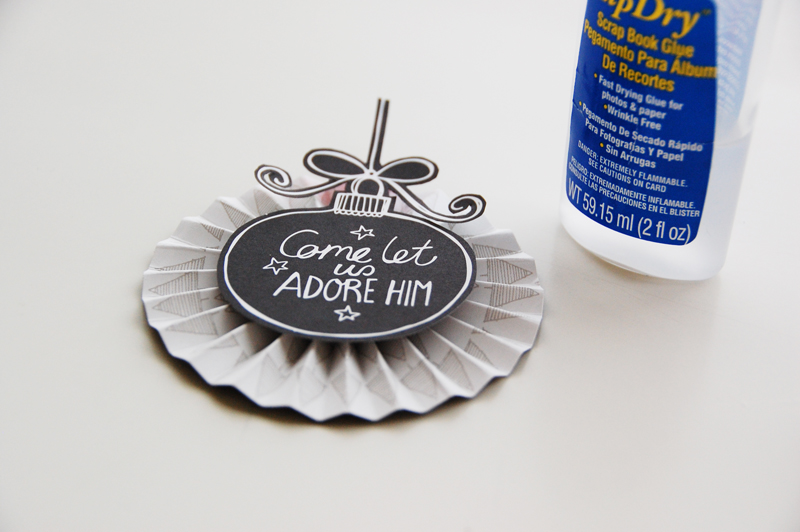
I then adhered the ornament to the center of the rosette to frame it.
I added a few puffy star stickers and a paper doily to the framed ornament before adding it to my card base. For the card base, I used the God’s Love Paper and the Borders Paper, along with some black cardstock.
I hope you enjoyed today’s Make It! Monday project. Thanks so much for stopping by!
Save
Save
Save