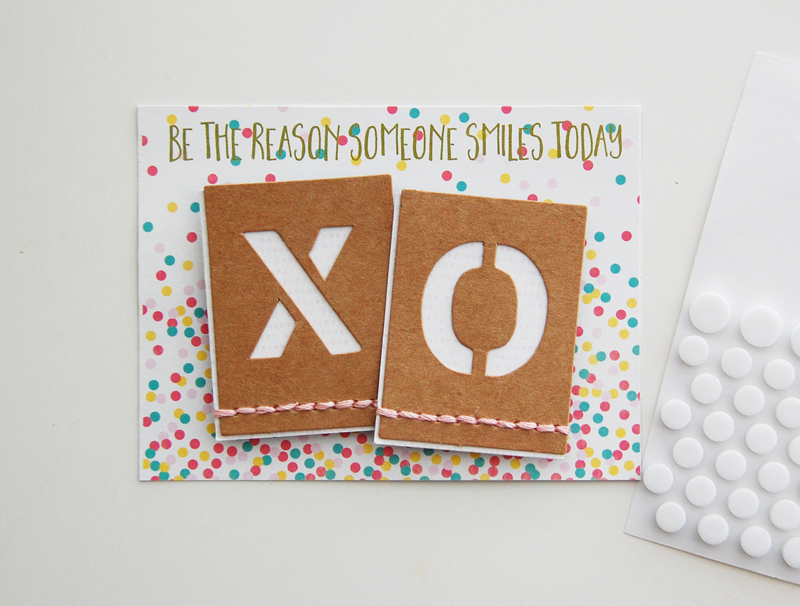
Hey, everyone! Roree here with another Make It! Monday project. Today I am sharing a sweet card I created using kraft Alpha Tiles from Jillibean Soup.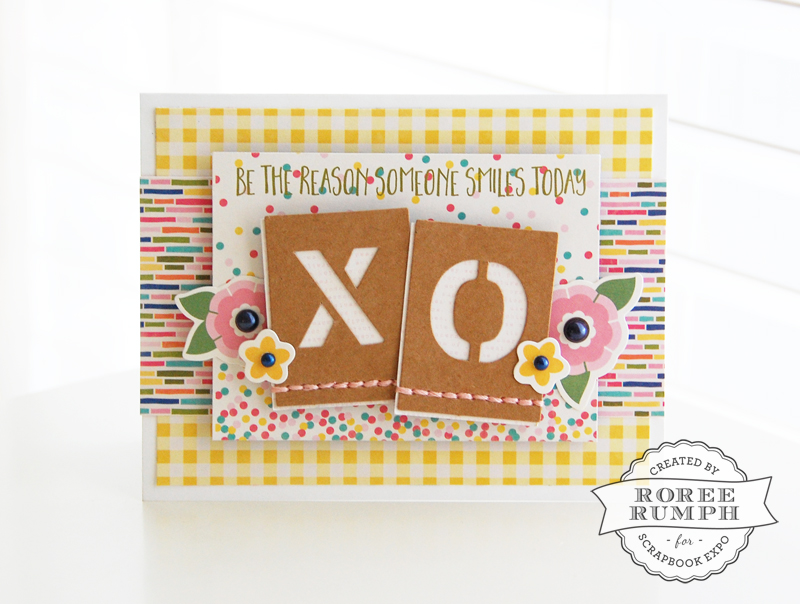
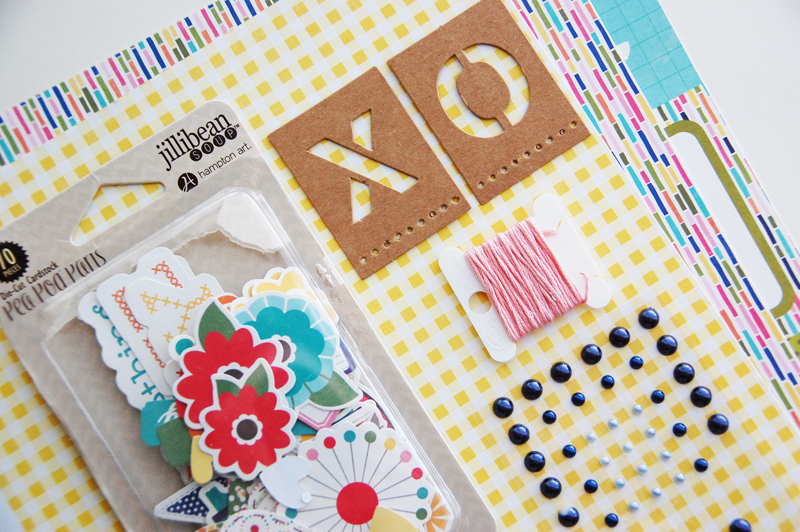
First, I chose the kraft Alpha Tile letters I wanted for my card sentiment along with some paper and embellishments to create the card. I chose papers from the new Healthy Hello Soup collection (Aged Aloha, Cup of Ciao, Healthy Hello Bite Sized Bits), die cuts from the Sew Sweet Sunshine Soup Pea Pods Parts pack, navy pearls, and pink embroidery thread.
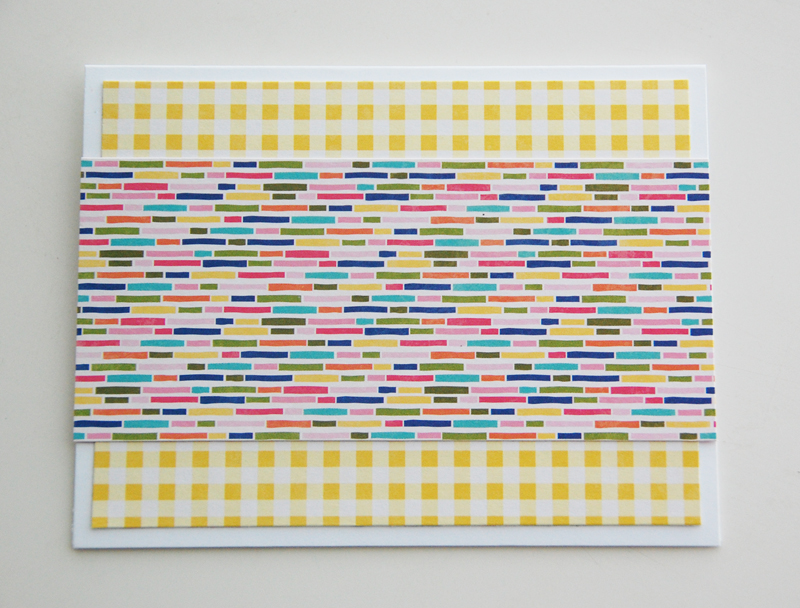
I cut the Aged Aloha patterned paper to 4 x 5 1/4″ and the Cup of Ciao patterned paper to 2 1/2 x 5 1/2″. Then, I layered and adhered the panels to the front of a white A2 card.
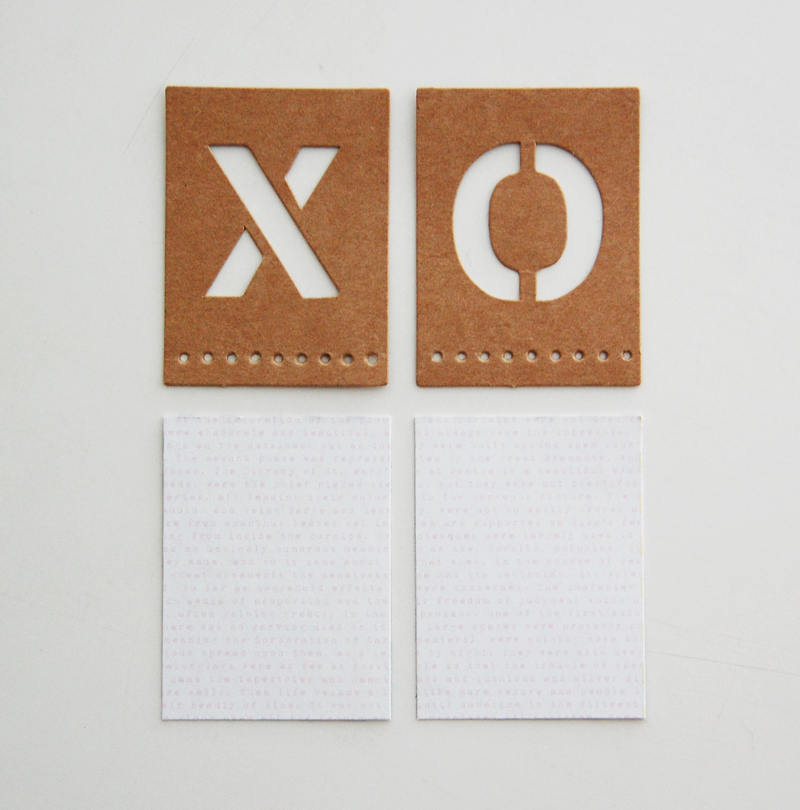
I cut out two 1 1/2 x 2″ panels (the same size as the Alpha Tiles) from a journal card on the Healthy Hello Bite Sized Bits patterned paper.
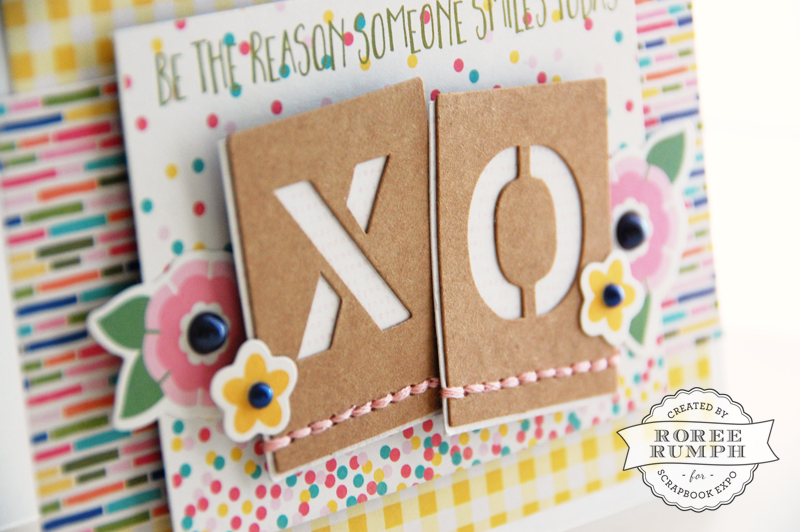
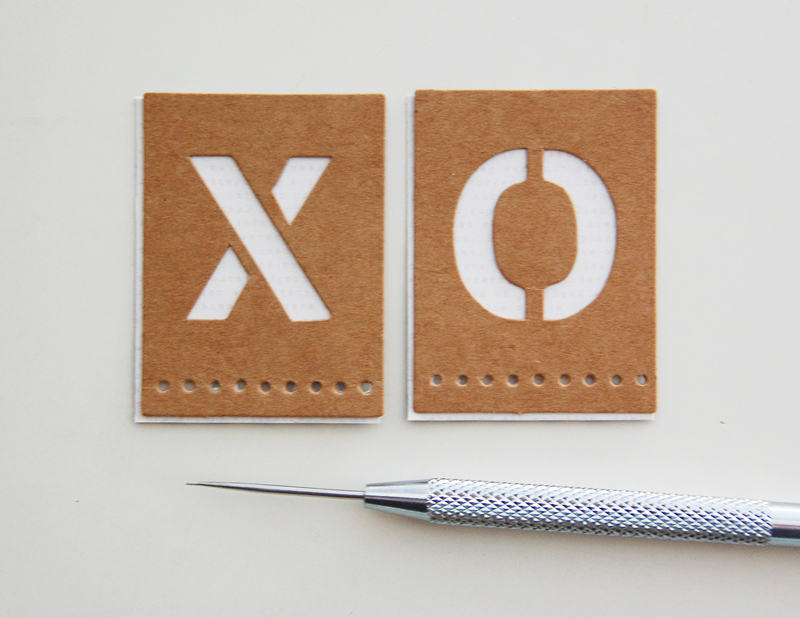
I adhered the tiles to the panels, offsetting the tiles slightly, and pierced holes through the the patterned paper panels with a paper piercer.
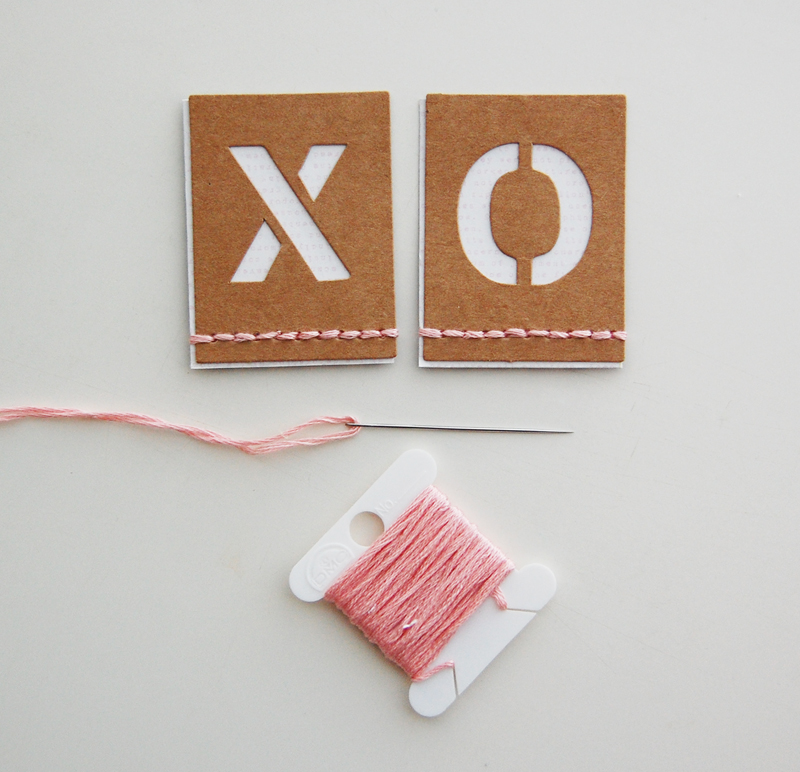
I hand stitched the tiles using a sewing needle and pink embroidery thread.
I cut the “Be the Reason Someone Smiles Today” journal card from the Healthy Hello Bite Sized Bits patterned paper and adhered the tiles to the center of the card, overlapping the two tiles at an angle, using foam adhesive.
I adhered a pink flower and a yellow flower die cut from the Sew Sweet Sunshine Soup Pea Pod Parts pack on each side of the tiles, adding a navy pearl to the center of each flower.
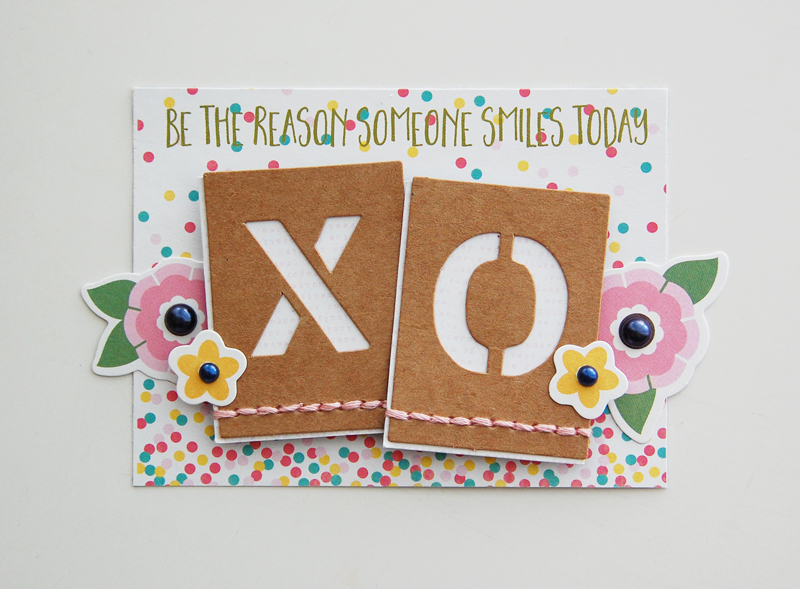
I adhered the journal card to the center of the card front to finish.
I have lots of Alpha Tiles left in the pack to make more fun projects. I can’t wait to use them up!
I hope you enjoyed today’s Make It! Monday project. Thanks so much for stopping by!