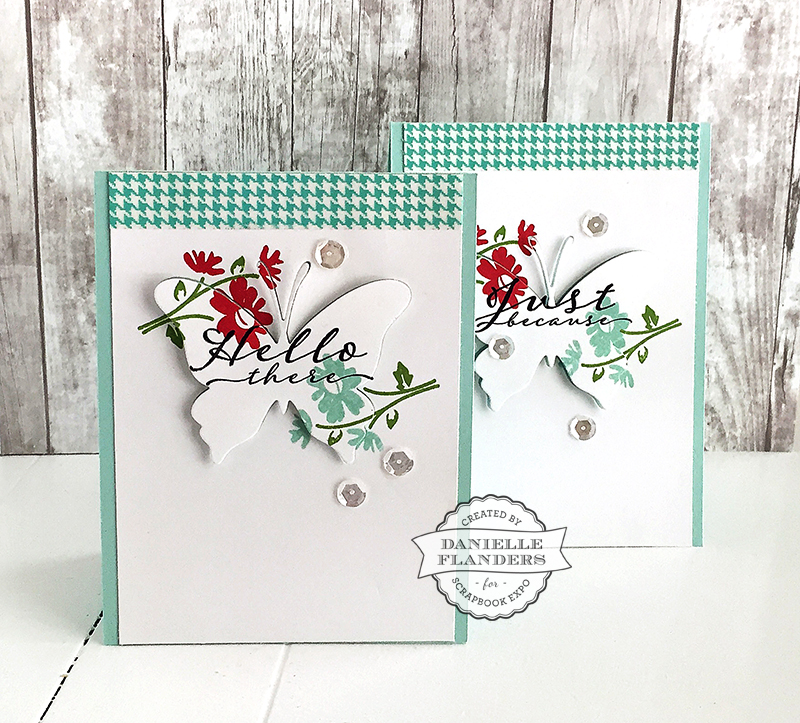
Happy Tuesday! Danielle here, and I have another quick card tutorial for you to try today, so break out your stamps and dies! We are going to add a bit of unexpected dimension to our stamped backgrounds.
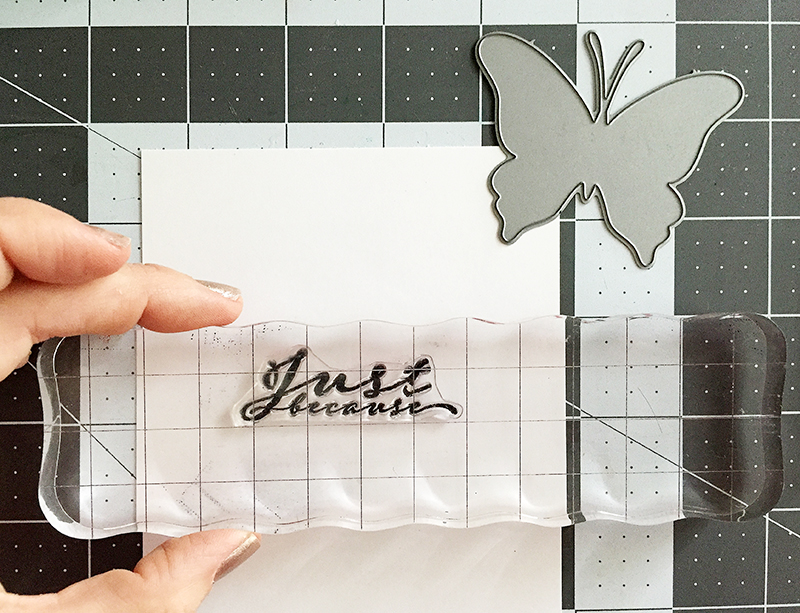
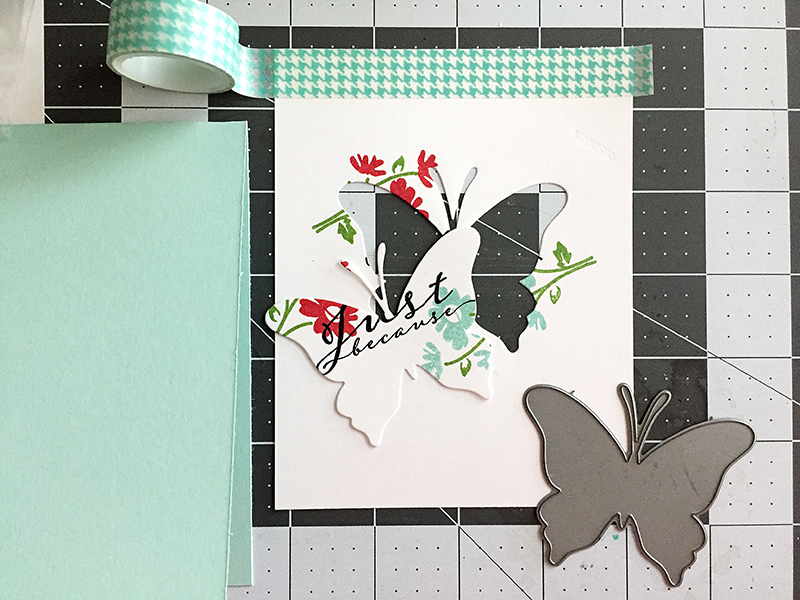
First, I stamped a sentiment in black ink in the center of my card. The sentiment is from Papertrey Ink’s Scripted stamp set.
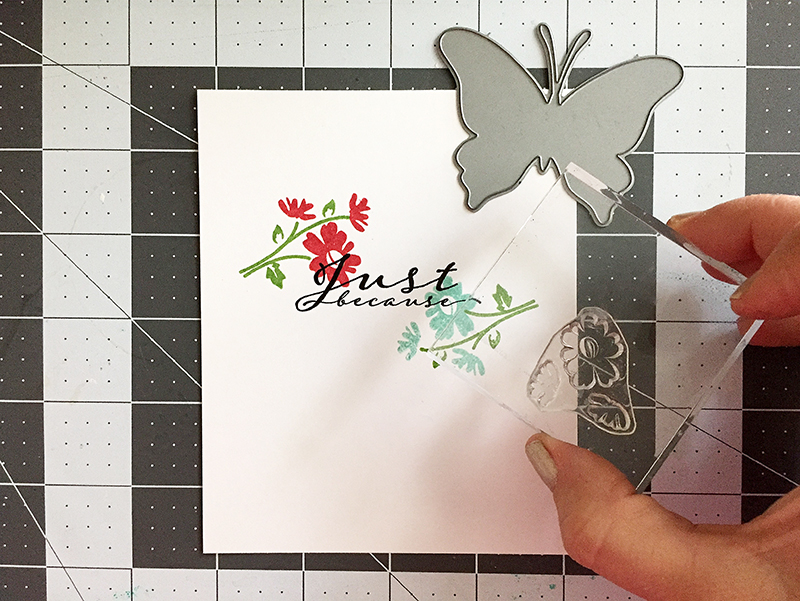
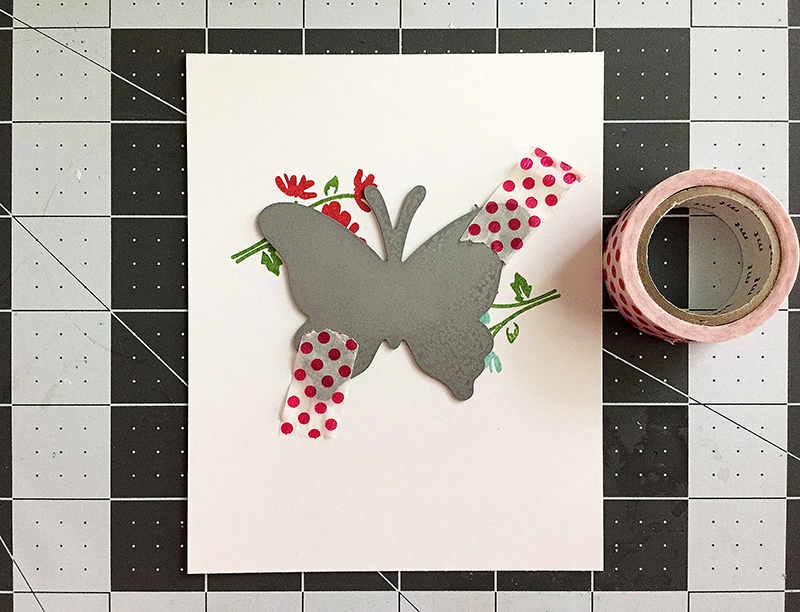
Next, I stamped two stems in green and the flowers in red and aqua to surround the sentiment. The flowers are from the Quilted: Summer stamp set by Papertrey Ink.
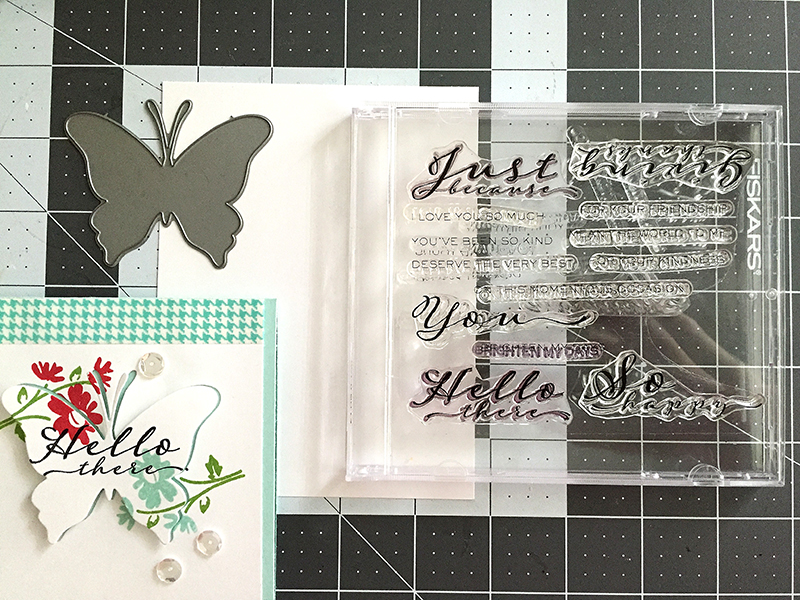
Next, I wanted to die cut a shape from the background that I just stamped. I chose a large solid butterfly die from the Life Is Beautiful die collection, but you could cut out a frame shape or any other shape you desire! Just make sure it fits within the stamping, as you want some of the stamping on the cut-out and some of the stamping hanging off the edge of the cut-out for maximum effect. I used washi tape to hold my butterfly die in place over the stamped background, then ran it through my Cuttlebug die cutting machine. You can also use painter’s tape or a post it note to hold the die in place while running it through your machine; anything that will peel up easily without tearing your card.
After removing the washi tape, you’ll have a butterfly cut out of the background. I created an aqua card base and added some aqua washi tape across the top.
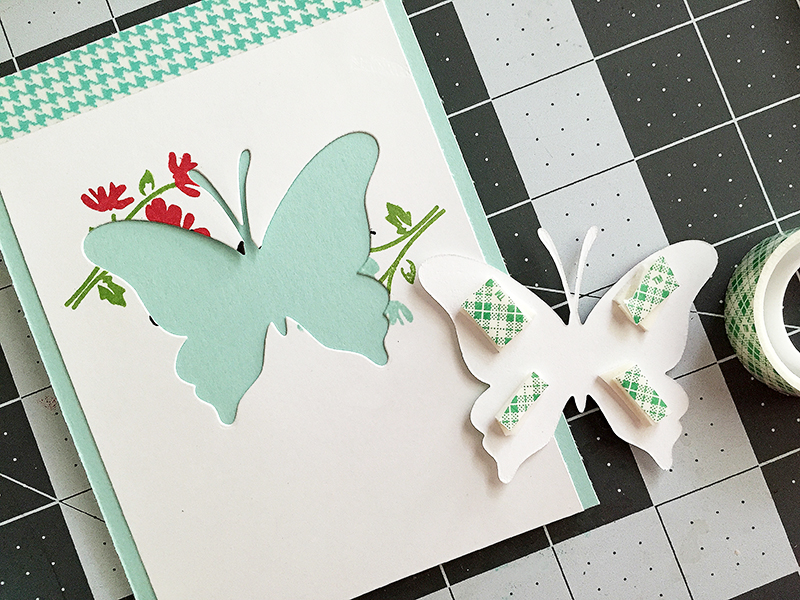
Then I added two stacks of foam tape to the back of the butterfly and adhered the card front to the aqua card base.
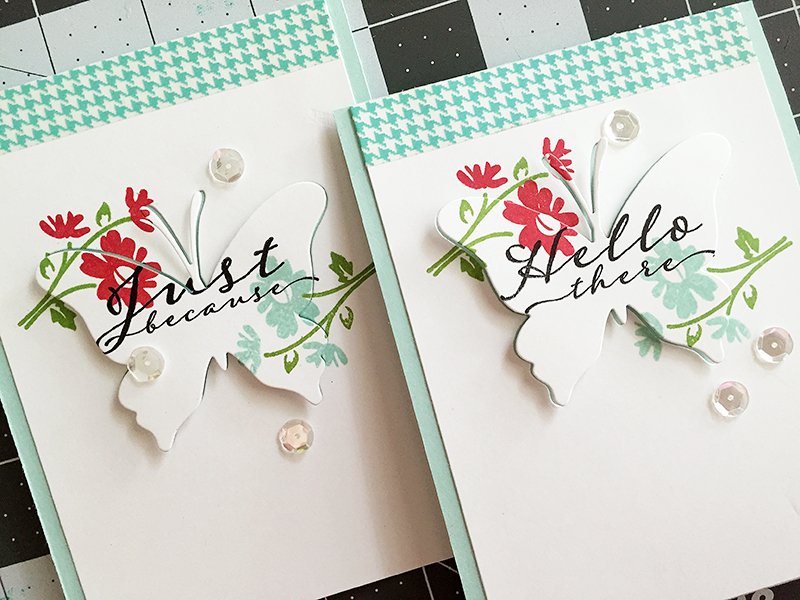
Last, I attached the butterfly back into its position where the cut-out was and adhered a few clear sequins by Pretty Pink Posh. (They are strategically placed to hide ink smudges! I can never make a card without a smudge!) I love how the stamping looks as if it’s going off the edge of the butterfly.
Here is a side view of the card.


Such a fun technique! I hope you’ll give it a try, and let me know how your card turns out. I always like to see what you are making! See you next week.
Danielle
I like this card idea!
Thank you, Jo! 😉
Always inspiring! Fabulous tutorial, Danielle! Love love the gorgeous cards!
Thank you, Virginia, for stopping by and leaving a sweet comment this morning – I appreciate it!
Beautiful, fresh CAS design, Danielle – love the step-by-step details too!
Thank you, Susi!
I love this technique and your cards are beautiful! I also like how you put washi tape across the top.
Thank you, Jenelle! I have a thing for washi tape, so many cute patterns and designs out there. 🙂
What beautiful cards! I love this idea so much and can’t wait to give it a try! Thank you for the inspiration.
Thanks, Cresta!
The tutorial is great and as usual you hit it out of the park on this design! Such inspiration…thank you!
Thank you, Nancy!
Love this card – thanks for sharing!
Thanks very much for your nice comment, Chris!
Wonderful technique idea! Thank you!
Thank you, Kristine!
I left a comment at your blog too but wanted to make sure you got one here. I LOVE these cards. Such a fabulous technique. I am going to try this when I get time in my craft room this weekend!!
Can’t wait to see your card, Nora! Thank you!
Wow!! Gotta try it… would’ve never thought of that…great way to give dimension…thanks for sharing
Thank you, Cristel!
Such a great job! Thank you for sharing.
Thank you, Veronika!
STUNNING!!
Thanks, Holly!
Danielle, these cards are beautiful and your instructions are so clear! I can’t wait to try this technique.
Thanks, Cammie!
What a great technique! Just when you think you’ve seen it all, you come up with a genius idea! Thank you – I can’t wait to try it!
Hope you’ll share your cards with us, Vicki! Thank you for stopping by.
Such a beautiful card….and a well done tutorial…..thank you for sharing!
Thank you, Mary!
Lovely card another great idea
Thank you, Jenny! Have a nice day!
Thank you, great idea.
Thank you, DotMc.
What great cards, Danielle! I happened upon your post this Sunday evening, and immediately PINNED it; then, in a unprecedented move, I grabbed ink, dies, stamps & paper to make my own! This has NEVER happened for me because I’m usually intimidated by the supplies needed, the techniques or something… Thanks for making this one dead simple enough for even me to accomplish and be pleased with the outcome!
~avis, 092715
So glad you were inspired, Avis! Thank you for your nice note!
Danielle, beautiful as always!! It’s really pretty yet easy enough for the not so experienced to make. I can’t wait to see what you have up your sleeve. I truly love your cards, thanks for sharing and inspiring.
Pretty cards, love the technique!
Thank you, Jan!
Love this simple card 🙂
Thank you, Juana! Have a nice day!