Hey, everyone! Roree here with another Make It! Monday project. Today I am sharing a card I created by die cutting a silhouette shape and decorating it with Washi tape placed in a patchwork pattern.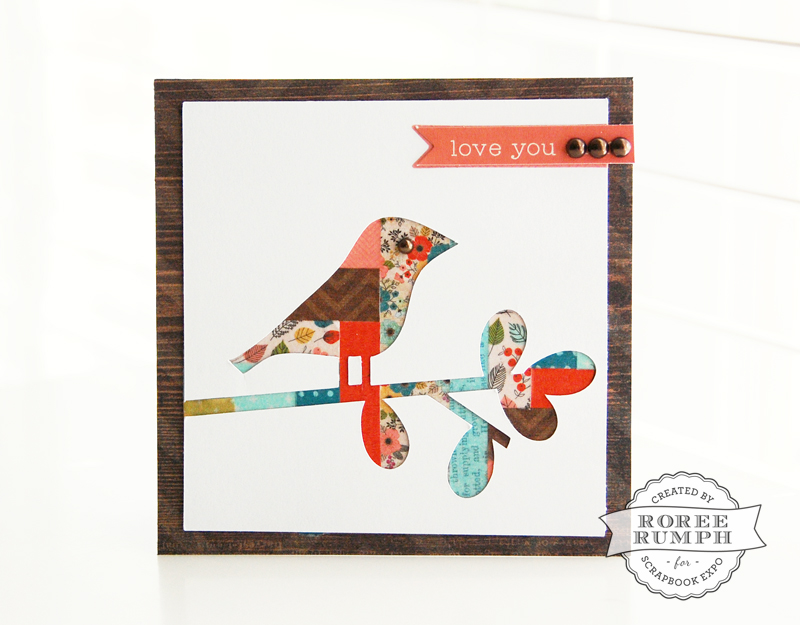 I love quilts and I find so much inspiration from the fun designs, colors, and patterns of fabric that quilters use to create them. As I was searching for inspiration for today’s project, I found this fun quilt on Pinterest here: patchwork dog quilt. With that in mind, I wanted to create a card with a similar style.
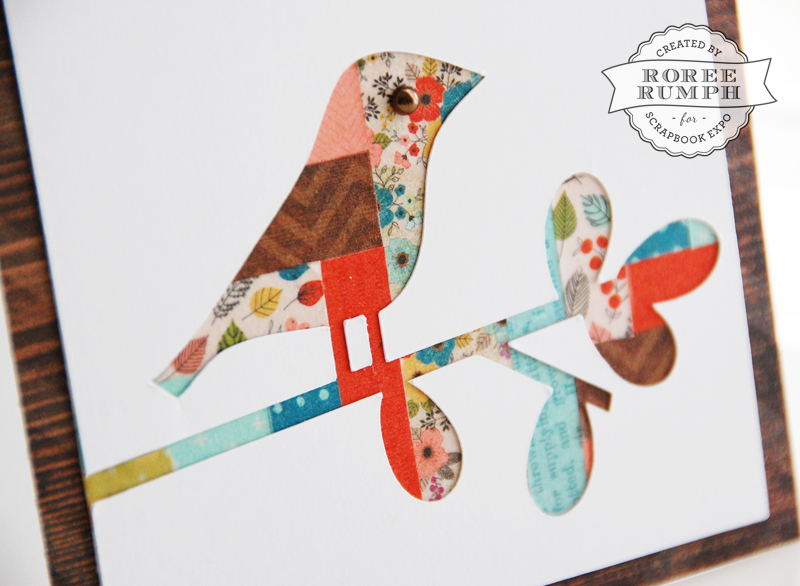
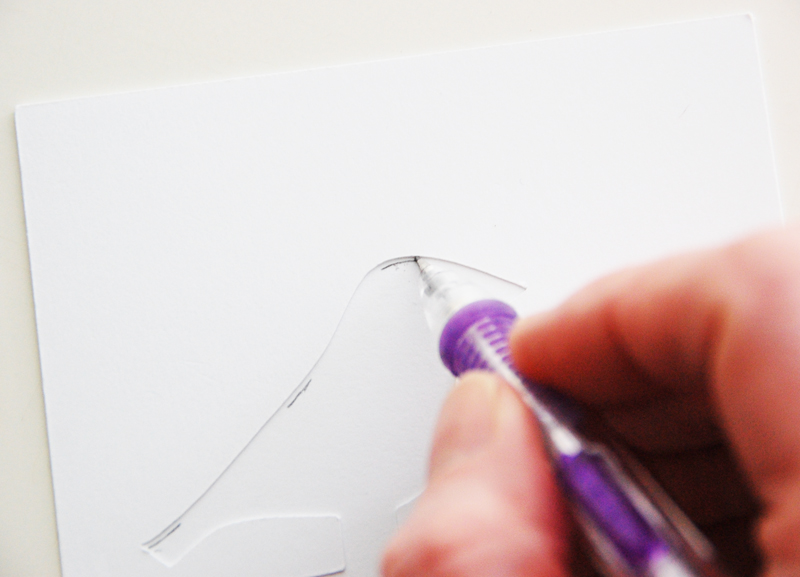
First, I started with the negative of a die cut shape (Cricut Design Space™, Songbird cartridge, Bird on Branch image) cut from a 4″ square of white cardstock, a 4″ square of white cardstock, and the Pink Paislee Cedar Lane Washi Shapes pack.
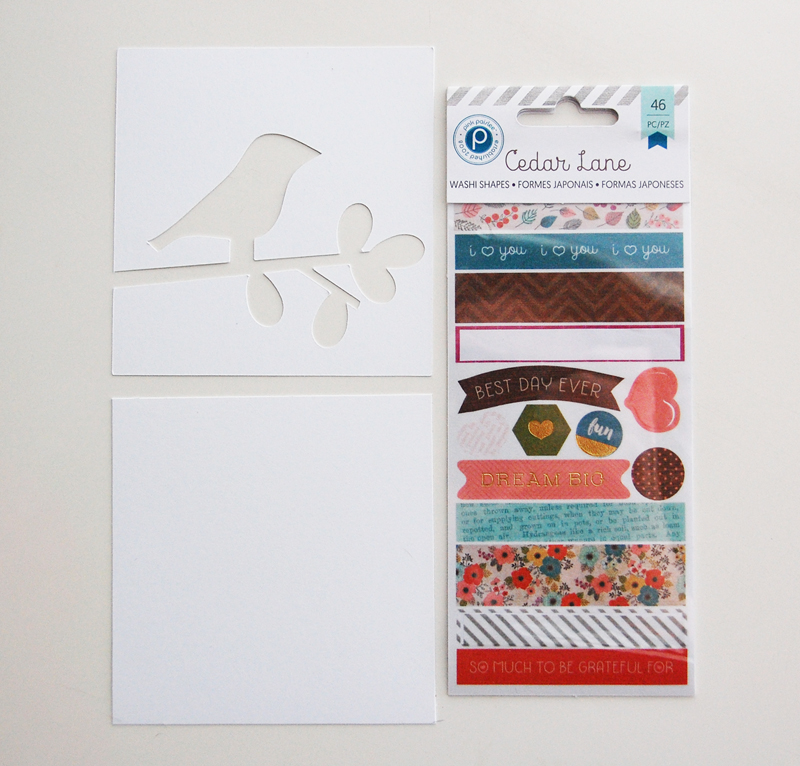
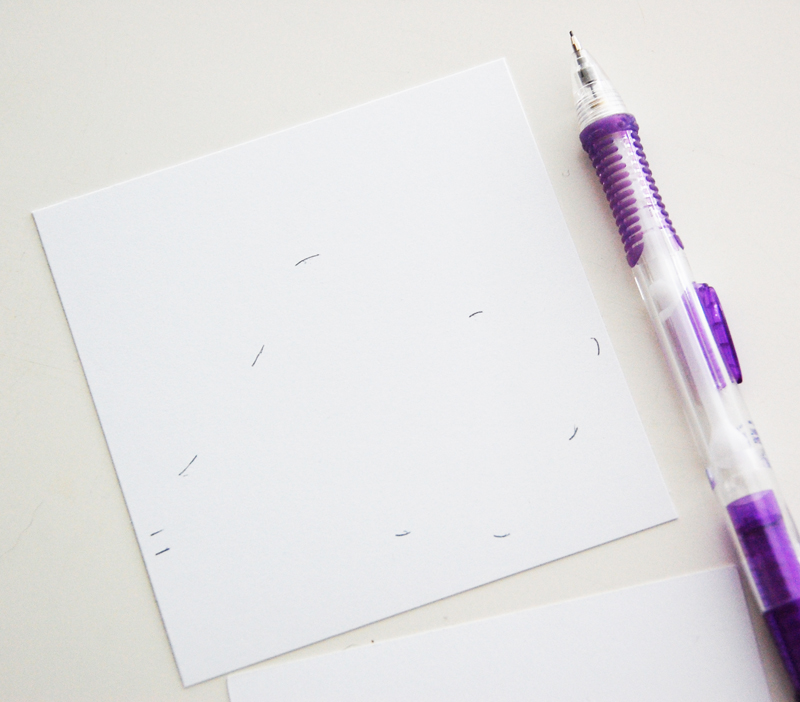
Since the Washi Shapes I used were only 3″ in length, I placed the negative die cut over the cardstock panel and marked a few places around the outline of the Bird on Branch shape to make sure I covered all of the area where the Washi Shapes tape would show.
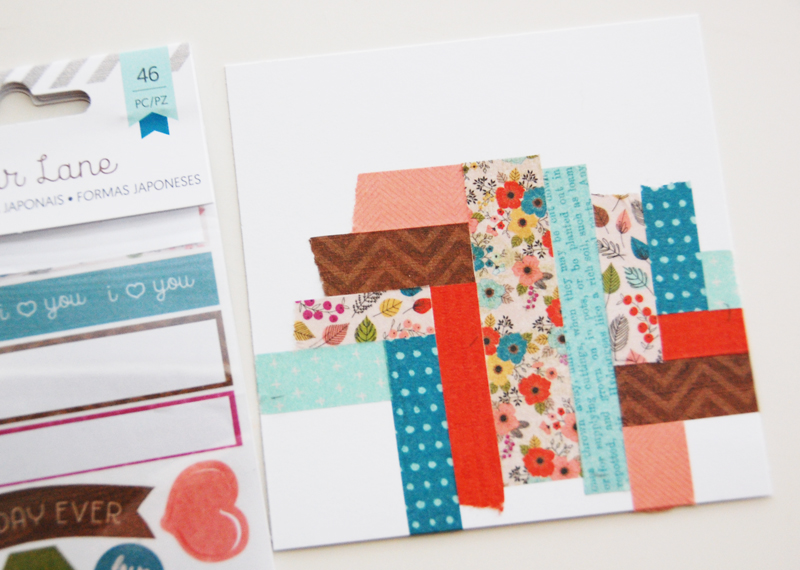
I placed the Washi Shapes tape in a patchwork pattern.
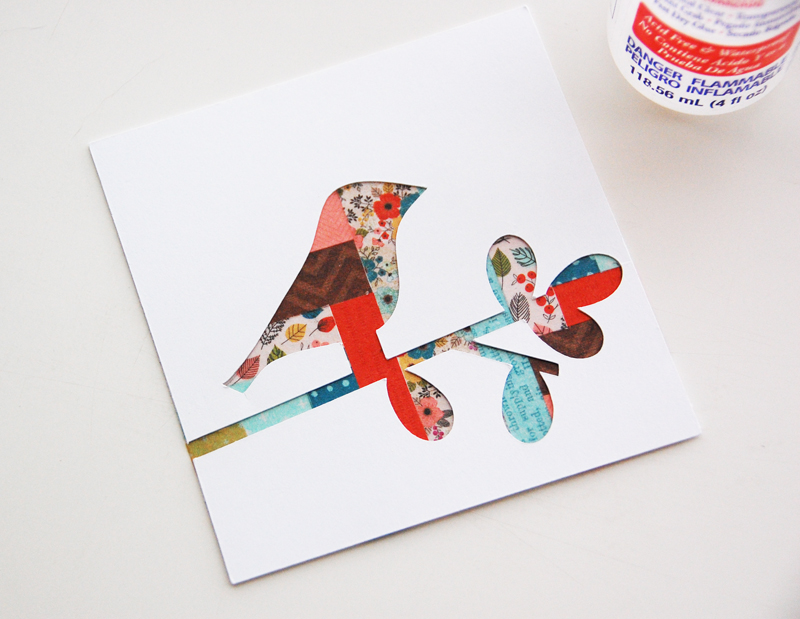
I then adhered the negative cut over the patchwork panel.
I added the patchwork panel over a piece of Walnut Street patterned paper, placed a Washi Shape banner and sentiment banner die cut at the top right corner, and finished the card with a few brown pearls.

I hope you enjoyed today’s Make It! Monday project. Thanks so much for stopping by!
Pretty; a really nice way for using up paper scraps too!!
So cute! I love to quilt also. What a great way to combine my 2 favorite hobbies.