
Creating a recessed panel can give you a beautiful focal point for a clean and simple card! Let me show you how I made my card for today.
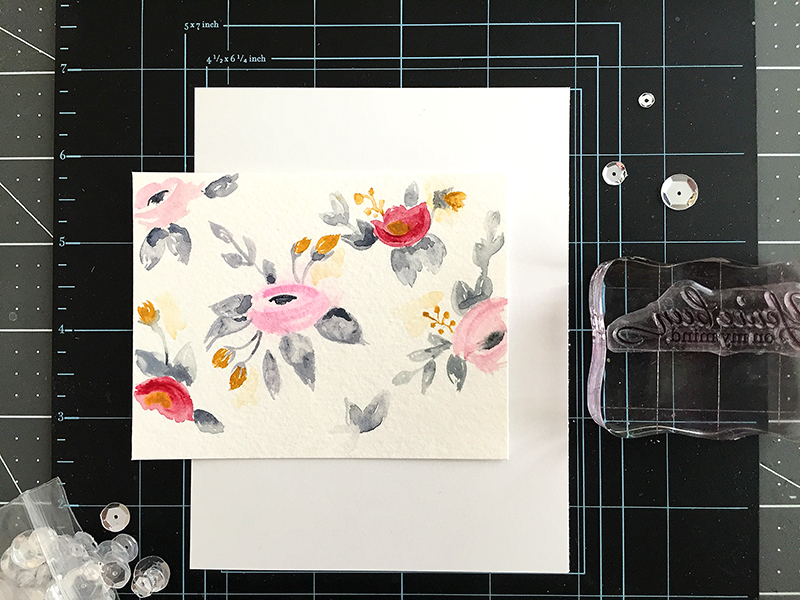
First, I cut an A2 sized piece of cardstock for the background of the card front. I’ll be placing all of my pieces on top of this to make sure my card front turns out to be the correct size, then will add it to a card base later.
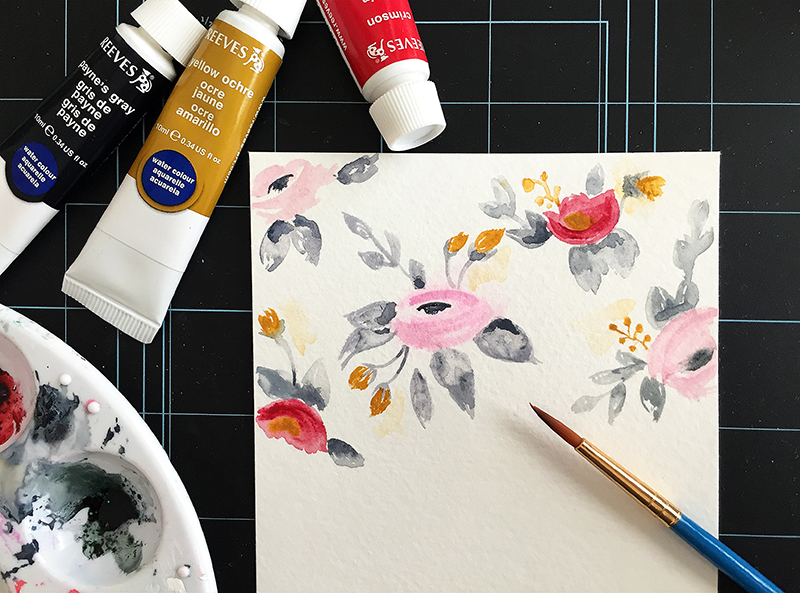
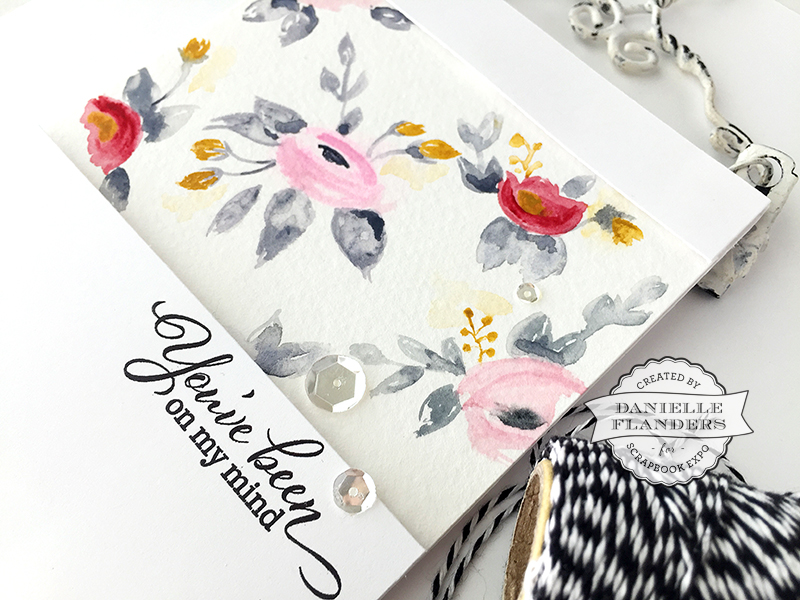
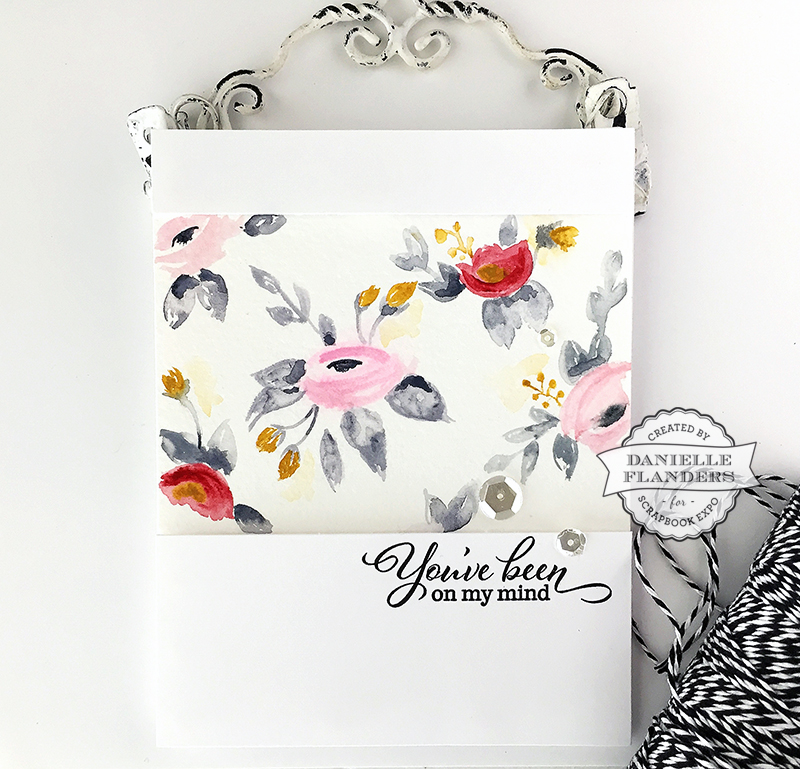
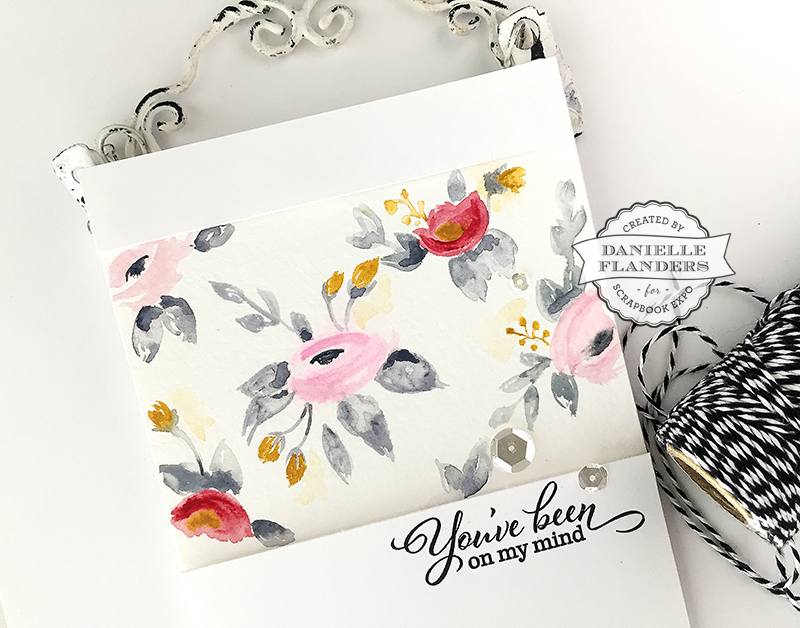
Next, I painted a little floral pattern with watercolors. You can use a preprinted pattern paper for this step, or stamp a design of your choosing!
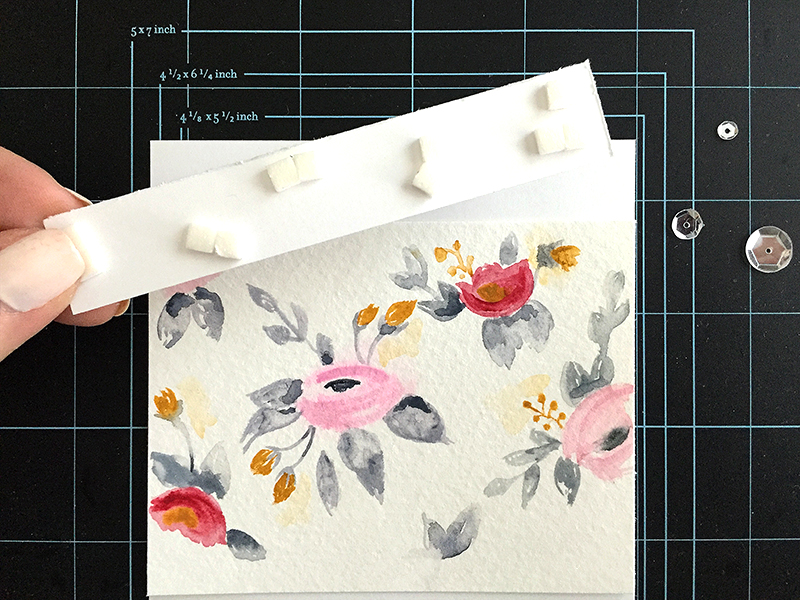
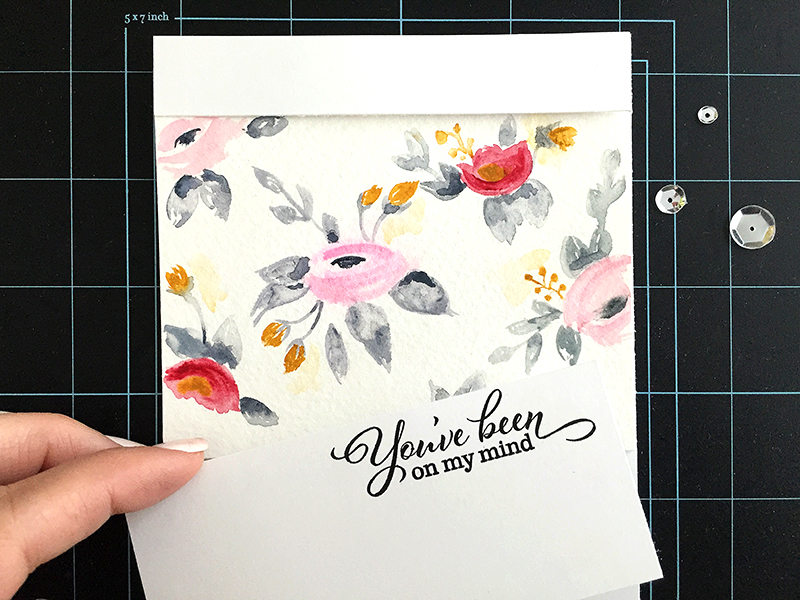
I cut the floral paper down to 4 1/4″ wide by 3 1/2″ tall and adhered it to the card about 1/2″ down from the top of the cardstock underneath. This will be the recessed panel. Two more panels were cut from white cardstock. The top piece is 3/4″ tall by the width of the card. The bottom piece is about 2″ tall by the width of the card. I stamped a sentiment on the bottom piece. (Stamp set is Friendly Flowers by Papertrey Ink.)

Next, I adhered the two panels with pop dots to the card to raise them up. The floral piece was adhered flat to the card, which will create a recessed panel.
I adhered the bottom panel with pop dots also, then added a few clear sequins for sparkle!
I really love how the pattern is the focal point! Remember, your focal point can be a pre-made patterned paper or a stamped design as well!
If you have any questions, please let me know. Have a creative day!
Beautiful…would you share how you get such a clean crisp stamped sentiment?